You’re not alone if you’ve been wondering how to repot your houseplants without damaging their roots or stunting their growth. Over 70% of indoor plant owners either delay repotting or do it incorrectly, often leading to drooping leaves, root rot, or even plant death. Whether your plant looks cramped or its soil dries out too fast, knowing how to repot your houseplants correctly can make all the difference.
This isn’t about guesswork or winging it with a new pot and some dirt. This guide walks you through what to look for, how to prep, and how to avoid the common mistakes that stress your plant out. If your plant’s health matters, this is the practical advice you’ve been searching for.
Signs Your Plant Needs Repotting
If your houseplant’s roots are pushing out of the drainage holes, it’s usually the first clue that space is getting tight. When roots peek out from the bottom, they search for more room or water, and your plant is likely ready for a new home. You might also notice that growth has slowed, even though you’ve given it the right amount of water and light. That’s another hint that the roots have outgrown their space and can’t absorb nutrients effectively.
Another giveaway is how quickly the soil dries out. If you water your plant and it feels dry again within a day, it could mean the root system is too dense, leaving little room for soil to hold moisture. Take a peek inside the pot—if you see roots circling the inner edge like they’re tracing the shape of the container, it’s time. These are all easy signs to spot with a quick look or touch.
Choosing the Right Pot and Soil
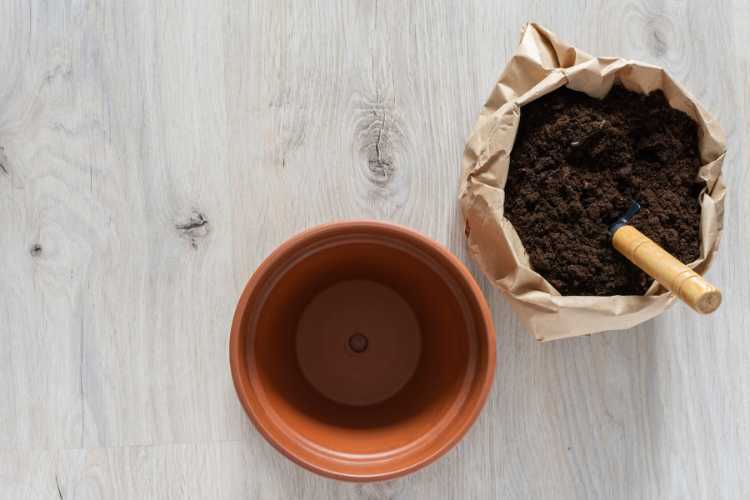
Start by picking a pot that’s only 1 to 2 inches wider in diameter than your current one. Too big, and the excess soil can hold more water than your plant needs, leading to root rot. Too small, and you’ll be repotting again in no time. The new pot should have drainage holes at the bottom—this prevents soggy soil and lets excess water escape easily, which is key for keeping roots healthy.
Don’t just scoop up dirt from outside when it comes to soil. Most houseplants use a light, well-aerated potting mix that drains easily. A peat, perlite, and coco coir mix works well for tropical plants like pothos or philodendrons. Cacti and succulents need something grittier, like a mix with added sand or pumice. If you’re trying to save money, you can mix your own using affordable ingredients from garden centers or online. Ensure the mix suits your plant type and drains well without compacting too much.
Preparing Your Plant for Repotting
The day before you repot, give your plant a light watering. Moist soil holds together better, making it easier to slide the plant out without tearing its roots. Dry soil can crumble apart or cling too tightly to the root ball, causing unnecessary stress. Once the soil is slightly damp, gather everything you’ll need: your new pot, the appropriate soil mix, a trowel or spoon, gloves if you prefer, and a surface that’s easy to clean—an old towel or plastic sheet works great.
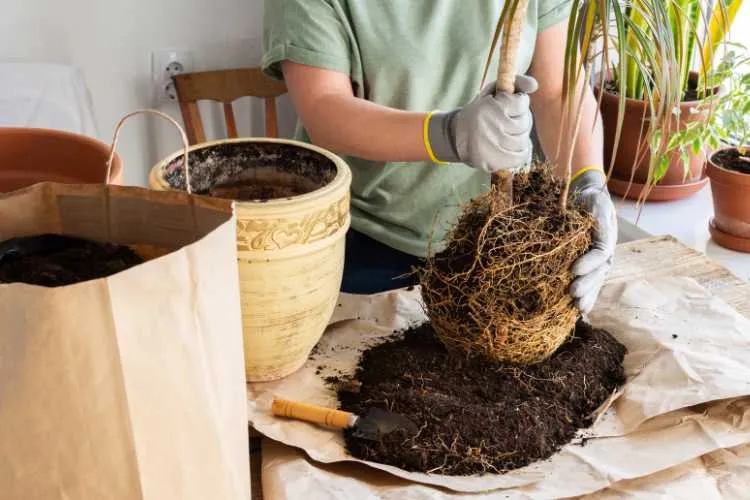
When you’re ready to remove the plant, turn the pot sideways and gently squeeze the sides if it’s flexible. Hold the base of the plant near the soil and slowly wiggle it out. If it’s stuck, tap the bottom or run a butter knife along the inside edge of the pot. Avoid yanking, which can break roots or stems. The goal here is to keep the root system as intact as possible while easing it free.
Step-by-Step Guide to Stress-Free Repotting
Repotting doesn’t have to be messy or intimidating. Follow these steps to make the process smooth and gentle on your plant.
1. Loosen and Inspect the Roots
- Gently remove the plant from its pot.
- Use your fingers to loosen any tangled or circling roots.
- Trim off any mushy, black, or dry roots using clean scissors.
- Healthy roots should be firm and white or light tan.
2. Add Soil to the New Pot
- Pour a layer of fresh potting mix into the bottom of the new container.
- Aim for a height that keeps the plant at the same soil level it had before.
- Lightly press the soil down to remove gaps without compacting it too tightly.
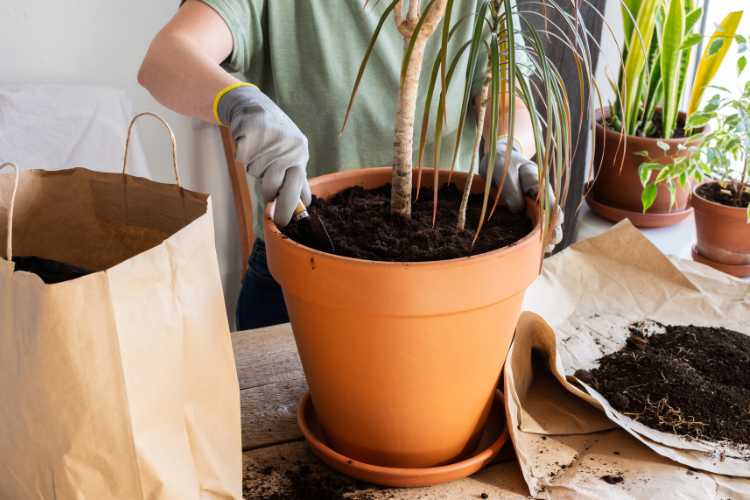
3. Position the Plant
- Place the plant in the center of the new pot.
- Check that it’s standing upright and straight.
- Adjust the soil underneath if it’s sitting too high or too low.
4. Fill Around the Root Ball
- Add soil evenly around the plant, filling in all sides.
- Press gently with your fingers to eliminate air pockets.
- Leave about 1 inch of space at the top for watering.
5. Settle the Soil and Water
- Tap the pot lightly on your work surface to help the soil settle.
- Water slowly and evenly until it drains from the bottom.
- Let the plant rest in a spot with indirect light to recover.
Caring for Your Plant After Repotting
Right after repotting, give your plant a good but gentle watering. The goal is to moisten the fresh soil without drenching it. Water slowly until you see it draining from the bottom—this helps settle the soil around the roots and reduces transplant shock. Don’t add fertilizer yet; your plant needs adjustment before adding extra nutrients.
Find a spot with bright, indirect light where the temperature stays stable. Avoid placing the plant in direct sun or near drafts for at least a week. Your plant’s energy is focused on root recovery, so too much heat or cold can stress it further. If your plant normally lives in high light, slowly ease it into its usual spot after a few days.
Keep an eye on it over the next two weeks without fussing too much. Check for wilting or drooping leaves, which are common but usually temporary. Stick to a steady watering routine, letting the top inch of soil dry before watering again. Resist the urge to poke around or move the plant—it needs time to settle in and regain its rhythm.
Common Mistakes to Avoid
One of the most frequent errors is choosing a pot that’s too large. While giving your plant extra room might seem like a good idea, too much soil can hold excess moisture, leading to root rot. Stick to that sweet spot—just 1 to 2 inches wider than the old pot. Another mistake is watering too heavily right after repotting. While moistening the new soil is good, overdoing it can suffocate tender roots that are still adjusting.
Another common issue is using the wrong soil mix. Regular garden soil is too dense and can compact easily in pots. Make sure you’re using a mix that suits your plant’s needs, whether it prefers fast-draining blends or something that retains moisture. Finally, try not to disturb the roots more than necessary. Pulling, untangling, or trimming too aggressively can shock the plant and delay recovery. A gentle touch goes a long way during repotting.
Frequently Asked Questions
Can you repot plants anytime?
You can repot most houseplants during their active growing season—usually spring or early summer. This gives them the best chance to recover and grow into their new pot. Repotting in winter, when many plants are dormant, can cause stress and slow recovery. That said, if your plant is rootbound or suffering in its current pot, it’s okay to repot when needed—just be extra gentle and monitor it closely afterward.
How long does it take for a plant to recover after repotting?
Most houseplants bounce back within one to two weeks, especially if given the right light and watering conditions. During this time, some drooping or yellowing leaves are normal. Avoid moving the plant around or making other big changes while it settles. As long as you see no signs of ongoing stress, like wilting that doesn’t improve or mushy roots, your plant is likely just adjusting to its new setup.
Should I fertilize immediately after repotting?
Hold off on fertilizer for at least two to four weeks after repotting. Fresh potting soil often contains nutrients that can support the plant in the short term. Adding fertilizer too soon may burn the roots or overwhelm the plant while it is recovering. Once your plant shows new growth, you can return to your normal feeding schedule.
Smart Growing Tips & Tricks
10 Signs You Might Have Too Many Houseplants (And How to Manage Them)
Why Your Wooden Planter is Rotting
Best Fertilizer for Flowering Plants in Pots
7 Indoor Plant Problems and How to Fix Them
Lighting for Indoor Plants: A Complete Guide