Growing mesclun is a fun and easy way to bring fresh, flavorful greens to your table. This mix of tender baby leaves offers a variety of colors, textures, and tastes, making every salad a little more exciting. The best part? Mesclun grows quickly, so you can start harvesting in just about a month. Perfect for gardeners who love quick rewards and delicious results, growing mesclun is a simple way to add homegrown goodness to your meals.
What Is Mesclun (Mesclun Mix)?
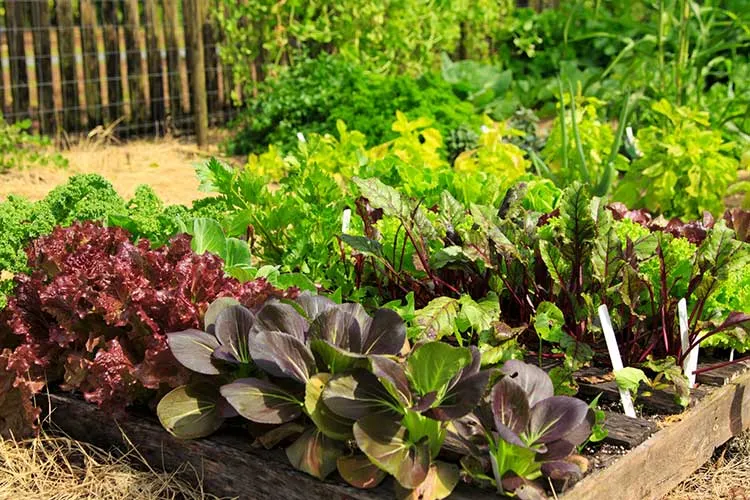
Mesclun, often called a spring mix, is a blend of young, tender salad greens harvested at their early stages for their mild flavors and delicate textures. The mix traditionally includes leafy greens like lettuces, arugula, mustard greens, and endive, offering a variety of tastes from sweet to peppery. Originally from France, the word mesclun translates to “mix,” perfectly describing this versatile, garden-fresh salad combination.
Types of Mesclun and How to Make Your Own Mix
Mesclun mixes can vary widely, offering diverse flavors, colors, and textures. The traditional French mix includes lettuces, arugula, chervil, and endive, but modern blends often expand to include Asian greens, spinach, mustard greens, and even edible flowers for added flair. Here are a few common types of mesclun mixes:
- Mild Mesclun Mix – Focuses on sweet and tender greens like butterhead lettuce, baby spinach, and red leaf lettuce.
- Spicy Mesclun Mix – Adds a kick with arugula, mustard greens, and mizuna.
- Custom Garden Mix – A mix of your favorite greens, tailored to your taste and growing conditions.
How to Make Your Own Mix
Creating your own mesclun blend is simple and rewarding. Start by selecting seeds for greens that match your flavor preferences and climate. Aim for a balance of textures and colors to make your salad both tasty and visually appealing.
- Choose Your Seeds – Pick 3-5 types of greens. For example, combine crisp lettuces, peppery arugula, and soft spinach. Consider adding mizuna or kale for depth.
- Blend Evenly – Mix the seeds together in a bowl, ensuring even distribution. If you prefer more of a certain green, adjust the ratio accordingly.
- Plant Your Mix – Sow your custom blend in rows or broadcast the seeds over a prepared garden bed or container.
The Best Site for Growing Mesclun Greens
Mesclun greens thrive when planted in the right location, making site selection a key factor for success. These tender greens prefer cool conditions, consistent moisture, and protection from harsh extremes. Here’s how to choose the perfect spot for your mesclun mix:
Sunlight
Mesclun grows best in partial sun, especially in warmer climates. Ideally, aim for a spot that receives about 4-6 hours of morning sunlight while offering afternoon shade to prevent the greens from wilting or bolting (going to seed too quickly). If you live in a cooler region, more direct sun—up to 8 hours—is perfectly fine.
Soil
Healthy soil is essential for lush, flavorful greens. Mesclun prefers loose, well-draining soil rich in organic matter. To boost nutrients, prepare the site by loosening the top 6-8 inches of soil and adding compost or aged manure. The ideal pH for mesclun is between 6.0 and 6.8, slightly on the acidic side.
Protection from Wind and Heat
Tender mesclun greens can struggle in strong winds or intense heat. To provide some natural protection, choose a sheltered area, such as alongside a fence or near other taller plants. In hot regions, you might consider planting near structures or using shade cloth to keep temperatures down.
Raised Beds and Containers
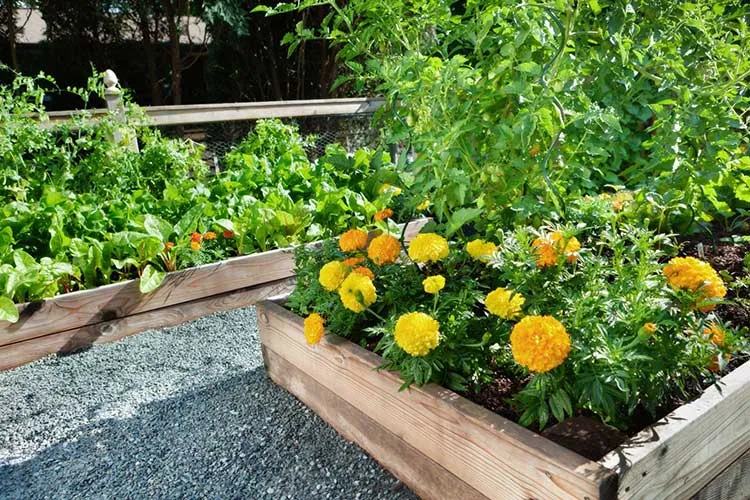
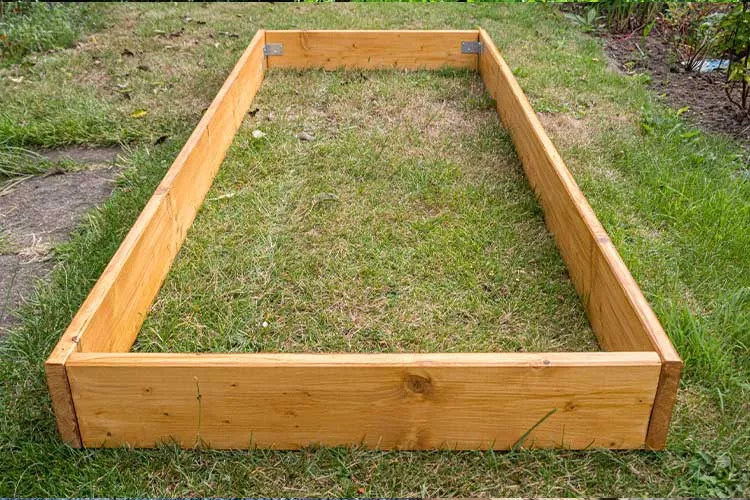
If your garden soil isn’t ideal, mesclun also grows beautifully in raised beds or containers. These options allow for better soil control, drainage, and accessibility. Place your raised beds or pots in a location that matches the sunlight and protection guidelines above.
When and How to Plant Mesclun
Mesclun greens are a fast-growing crop that thrives in cool weather. They are perfect for spring and fall planting. With the right timing and technique, you can enjoy multiple harvests of fresh, tender greens throughout the season.
When to Plant Mesclun
- Spring Planting: Sow mesclun seeds as soon as the soil can be worked, typically 2-4 weeks before the last frost date. The seeds germinate best when soil temperatures are between 45°F and 65°F.
- Fall Planting: Sow seeds for a fall crop 6-8 weeks before the first expected frost. Mesclun tolerates light frosts, making it a reliable choice for cool-season gardening.
- Succession Planting: To keep a continuous supply, plant mesclun every 10-14 days throughout the season. This staggered approach ensures fresh greens are always available.
Planting Mesclun in the Ground
- Prepare the Soil: Loosen the top 6-8 inches of soil and mix in compost for added nutrients and better drainage. Rake the surface smooth.
- Sow the Seeds: Scatter seeds lightly over the soil surface or plant in shallow rows about 1/4 inch deep. Space rows 4-6 inches apart to allow for easy harvesting.
- Water Gently: After sowing, water the soil gently to keep it moist but not soggy. Avoid heavy watering, which can wash away the tiny seeds.
- Thin Seedlings: Once the seedlings are 1-2 inches tall, thin them to 2 inches apart to give each plant room to grow. Don’t toss the extras—these tender seedlings make a great early salad!
How to Grow Mesclun from Seed
Mesclun seeds germinate quickly, usually within 4-7 days. To encourage healthy growth:
- Keep the soil consistently moist until germination occurs.
- Monitor for weeds, as mesclun seedlings can be easily overtaken.
- If temperatures rise above 75°F, consider using shade cloth to cool the soil and prevent bolting.
Tips for Successful Planting
- Choose the Right Time: Plant during cool months for the best flavor and growth.
- Broadcast Planting: For a more natural look, sprinkle seeds evenly across a small garden bed rather than planting in rows.
- Use Mulch: Apply a light layer of straw mulch to keep the soil moist and discourage weeds.
- Shallow Roots, Gentle Care: Mesclun has shallow roots, so be careful when watering or cultivating the soil to avoid disturbing the plants.
How to Grow Mesclun in Containers
Growing mesclun in containers is a fantastic option for gardeners with limited space or those who prefer a portable salad garden. With the right pot and care, you can enjoy fresh greens on a patio, balcony, or windowsill.
Can You Grow Mesclun Mix in a Container?
Absolutely! Mesclun thrives in containers because of its shallow root system and quick growth. Containers also allow you to control soil quality, water levels, and light exposure. Choose a pot that’s at least 6-8 inches deep and has good drainage holes. Wide, shallow containers work well for mesclun because it spreads across the surface.
Potting and Repotting Tips
- Select the Right Soil: Use a high-quality potting mix that retains moisture but drains well. Avoid garden soil, which can become compacted in pots.
- Prepare the Container: Fill your container with moist potting mix, leaving about an inch of space at the top.
- Sow the Seeds: Scatter mesclun seeds evenly across the surface or sow them in shallow rows. Cover lightly with a thin layer of soil—about 1/4 inch—and gently pat it down.
- Water Thoroughly: After planting, water the soil gently to keep it evenly moist. Containers dry out faster than garden beds, so check daily and water as needed.
- Position for Success: Place the container in a spot that receives 4-6 hours of sunlight daily. If temperatures are high, move it to a shadier spot to prevent bolting.
Pro Tip: For a continuous harvest, sow new seeds every 10-14 days in the same or additional containers. This ensures you always have tender greens ready to pick!
Growing mesclun in containers is easy, convenient, and perfect for gardeners of all experience levels. Whether it’s a small patio pot or a larger raised container, you’ll have fresh greens at your fingertips all season long.
Mesclun Plant Care
Caring for mesclun is simple and rewarding, as these greens are relatively low-maintenance. With the right balance of light, water, and nutrients, you’ll enjoy tender, flavorful leaves throughout the growing season.
Light Requirements
Mesclun grows best in partial sun, ideally receiving 4-6 hours of sunlight per day. Too much intense heat or direct sunlight can cause the greens to bolt (go to seed), which leads to bitter leaves. If you’re growing mesclun in a hot climate, provide afternoon shade using shade cloth or plant near taller crops that offer natural cover.
Soil Conditions
Healthy, well-draining soil is key for mesclun. Use a mix that’s rich in organic matter, such as compost or aged manure. The ideal soil pH is between 6.0 and 6.8, slightly acidic to neutral. Loose, crumbly soil allows mesclun’s shallow roots to grow easily and absorb nutrients. Before planting, work 2-3 inches of compost into the topsoil for added fertility.
Watering Needs
Mesclun greens need consistent moisture to stay tender and prevent wilting. Aim to keep the soil evenly moist but not waterlogged. A good rule of thumb is about 1 inch of water per week, including rainfall. Use a watering can or a gentle spray nozzle to avoid disturbing the shallow roots. Mulching around the plants can help retain moisture and suppress weeds.
Temperature and Humidity
Mesclun thrives in cool conditions, with an ideal temperature range of 45°F to 65°F. It can tolerate light frosts, making it perfect for spring and fall gardens. In hot weather, the greens may bolt quickly, so keep them cool with shade and frequent watering. High humidity isn’t usually a problem, but ensure good airflow to prevent fungal diseases.
Fertilizer Tips
Mesclun is a fast-growing crop that doesn’t require heavy feeding. If the soil is rich in organic matter, little to no additional fertilizer is needed. For an extra boost, apply a balanced, water-soluble fertilizer (like a 10-10-10 mix) at half strength every 3 to 4 weeks. Avoid over-fertilizing, as this can encourage rapid, leggy growth and affect flavor.
Overwintering Care
In mild climates, mesclun can grow through winter with little protection. To insulate plants from freezing temperatures, use a cold frame, row cover, or frost blanket. If you’re growing mesclun in containers, move them to a sheltered spot, like a greenhouse or sunroom, to extend the harvest.
With proper care, your mesclun greens will thrive and reward you with a steady supply of fresh, homegrown salad leaves.
How to Harvest and Store Mesclun Greens
Harvesting mesclun greens at the right time ensures they stay tender and flavorful. With proper techniques and storage, you can enjoy fresh salads straight from your garden for days.
When to Harvest Mesclun
Mesclun greens grow quickly and can be harvested in as little as 3-4 weeks after planting. The ideal time to harvest is when the leaves are 3-6 inches tall. At this stage, they’re tender, mild, and perfect for fresh salads.
- Baby Greens: Harvest baby greens when the leaves are still young and small for the sweetest, most delicate flavor.
- Continuous Harvest: Use the “cut-and-come-again” method to extend your harvest throughout the season.
Harvesting Techniques
- Cut-and-Come-Again Method:
- Use clean, sharp scissors or garden shears to cut the leaves about 1 inch above the soil.
- Avoid cutting the crown (center) of the plant to allow it to regrow.
- This method lets you harvest multiple times from the same plants.
- Whole Plant Harvest:
- If you prefer, you can pull up the entire plant. This is ideal toward the end of the season when greens may start to bolt.
- Rinse and use immediately or store appropriately.
Tip: Harvest early in the morning when leaves are cool and crisp. This helps preserve their freshness.
Storage Tips for Fresh Mesclun
- Don’t Wash Before Storing: Excess moisture can cause the leaves to wilt quickly. Wait to wash until just before eating.
- Use Airtight Containers: Place unwashed mesclun in a loose, breathable container or a plastic bag lined with a paper towel to absorb excess moisture.
- Refrigerate Immediately: Store your greens in the refrigerator’s crisper drawer at around 35°F to 40°F. This helps maintain freshness for up to 5-7 days.
- Reviving Wilted Leaves: If the greens begin to wilt, soak them briefly in cold water and pat them dry with a paper towel to restore their crispness.
Pruning and Propagating Mesclun
Pruning mesclun is less about maintenance and more about harvesting to keep the greens productive. Proper techniques encourage healthy regrowth, while propagation ensures a steady supply of fresh greens throughout the growing season.
Pruning for Continuous Harvest
Mesclun greens thrive with regular “cut-and-come-again” harvesting. Pruning, in this case, means snipping leaves frequently to promote new growth.
- Use clean, sharp scissors to cut leaves about 1 inch above the soil.
- Focus on harvesting the larger outer leaves while leaving the smaller inner ones intact. This encourages ongoing production.
- Regular pruning prevents the plants from becoming overcrowded and slows down bolting, which can cause bitterness.
Tip: Don’t wait too long to prune. Overgrown leaves become tough and may hinder new growth.
Propagating Mesclun for a Continuous Supply
Mesclun is easy to propagate since it grows quickly from seed, making it ideal for succession planting.
- Direct Sowing: Every 10-14 days, sow a new batch of seeds in prepared soil or containers. This staggered planting ensures a fresh harvest every few weeks.
- Reseeding in the Same Spot: After harvesting an entire section, lightly rake the soil, add a thin layer of compost, and sow new seeds. Water gently, and you’ll have new greens sprouting quickly.
Pro Tip: Keep a small packet of mesclun seeds handy to reseed gaps in your garden or containers throughout the season.
With regular pruning and succession planting, your garden will provide a near-endless supply of crisp, tender mesclun greens.


