What Is Spring Mix and Why Grow It?
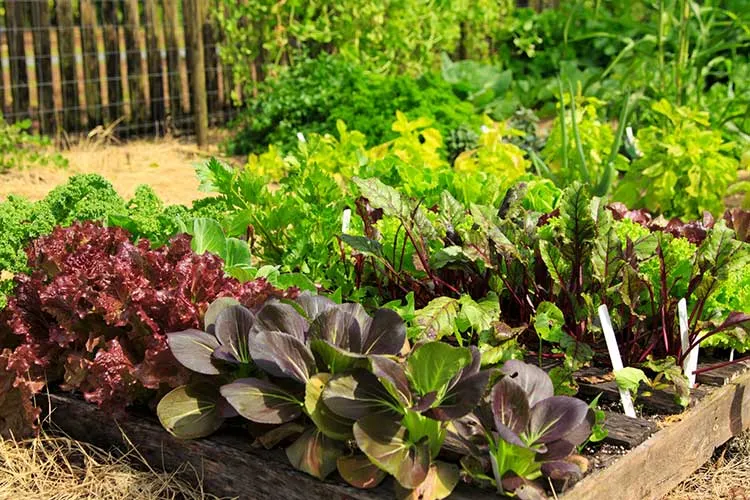
Spring mix is a delightful medley of leafy greens, often including lettuces, spinach, and baby kale, prized for its tender texture and mild yet varied flavors. These greens thrive when grown together, creating a mix that’s as nutritious as it is versatile in the kitchen.
For gardeners, spring mix offers an easy and rewarding way to cultivate fresh, homegrown salad ingredients. It’s suitable for beginners due to its quick growth and forgiving nature, while experienced growers love its high yield and continuous harvest potential.
In this guide, you’ll learn everything you need to know about growing spring mix—from choosing the right conditions to troubleshooting common problems. Whether you’re growing it in your backyard or a small container, you’ll soon enjoy an abundance of fresh greens!
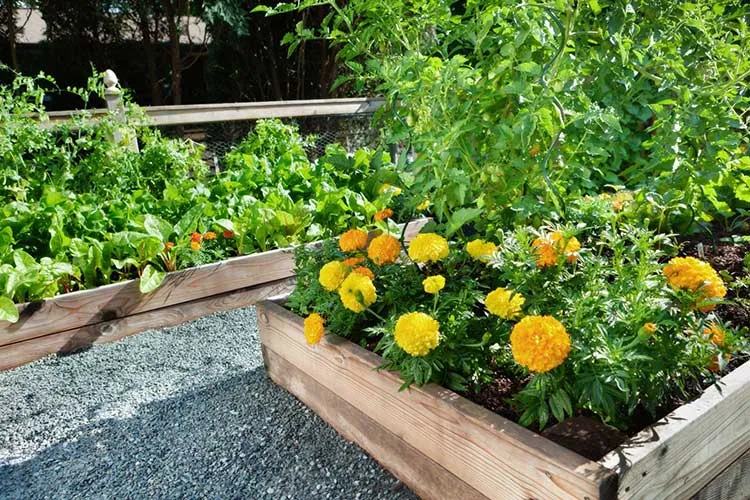
Choosing the Right Conditions for Spring Mix
Growing a thriving spring mix starts with creating the perfect environment. To give your greens a head start, here’s what you need to know about soil, light, and climate.
Soil Requirements
Spring mix greens prefer loose, well-draining soil rich in organic matter. Start by loosening the soil to improve aeration and drainage. Mix in compost or a balanced organic fertilizer to boost nutrients and ensure your greens grow lush and flavorful. Aim for a soil pH between 6.0 and 7.0 for optimal growth. If your soil tends to be sandy or heavy with clay, adding amendments like peat moss or aged manure can improve texture and fertility.
Light Requirements
Spring mix grows best in full sun but can tolerate partial shade, especially in warmer climates. For optimal growth, aim for 4-6 hours of direct sunlight daily. Providing some afternoon shade can help prevent overheating and bolting, especially during late spring or early summer. Proper lighting ensures vibrant, healthy leaves that pack a punch in flavor.
Ideal Climate and Temperature
Spring mix thrives in cooler weather, making it perfect for early spring or fall planting. Ideal daytime temperatures range between 50–70°F (10–21°C), with nighttime lows above freezing. In warmer regions, consider planting in early spring or using shade cloth to protect greens from excessive heat. Mulching can also help regulate soil temperature and retain moisture during unpredictable weather.
Step-by-Step Guide to Planting Spring Mix
Planting spring mix is straightforward and rewarding. Follow these steps to ensure a bountiful harvest of fresh, tender greens.
Seed Selection
Spring mix typically comes as a pre-mixed blend of seeds, combining varieties like romaine, arugula, and baby spinach. These mixes are widely available at garden centers, online retailers, or local nurseries. Choose an organic blend if you prefer pesticide-free greens, or look for a mix labeled for your growing zone. Some blends are tailored for specific flavors, like spicy or mild, so pick one that suits your taste.
Sowing Seeds
Prepare your garden bed or container by loosening the soil and removing weeds. Scatter the seeds evenly across the surface for a mixed harvest, or plant them in rows spaced about 4-6 inches apart for easier maintenance. Cover the seeds lightly with about ¼ inch of soil, as they need some light to germinate. Gently press the soil down to ensure good seed-to-soil contact, then water lightly to keep the area moist.
When is The Best Time to Plant Spring Mix?
Plant spring mix seeds as soon as the danger of frost has passed in early spring or 6-8 weeks before the first frost in the fall. In mild climates, you can plant year-round, provided temperatures stay in the optimal range. For a steady harvest, consider succession planting every 2-3 weeks.
Germination Timeline
Spring mix seeds typically germinate within 5-10 days, depending on the temperature. To ensure success, keep the soil consistently moist but not waterlogged during this period. If temperatures are too warm, germination may slow down, so consider starting seeds in a cooler spot. Once the seedlings appear, thin them out slightly if they’re overcrowded to give each plant room to grow.
Caring for Your Spring Mix
Proper care ensures your spring mix grows healthy, flavorful, and abundant. Here’s how to nurture your greens from seedlings to harvest.
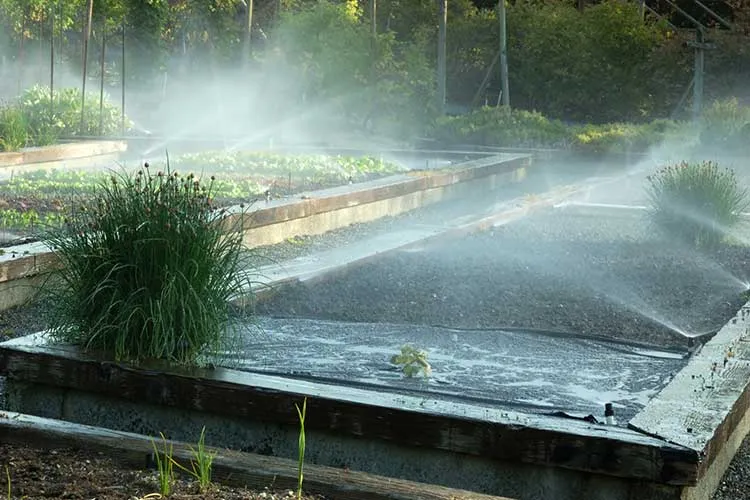
Watering
Spring mix requires consistent moisture to thrive. Depending on weather conditions, water your plants about two to three times a week. Keep the soil evenly moist, but avoid overwatering, which can lead to root rot. If the leaves look limp or wilted, they may need more water. Soggy soil or yellowing leaves can indicate overwatering. Use a watering can with a gentle spray to avoid disturbing delicate plants.
Thinning Plants
Thinning is essential for proper growth, as overcrowded plants compete for resources. Once your seedlings are a few inches tall, gently pluck or cut excess plants at the base to thin them to about 2 inches apart. This step ensures each plant gets enough sunlight, nutrients, and air circulation. Don’t discard the thinned greens—they’re perfect for a mini harvest!
Fertilization
Though spring mix grows quickly, light fertilization can give it an extra boost. Use an organic fertilizer, like fish emulsion or compost tea, every 2-3 weeks during the growing season. Avoid over-fertilizing, as this can lead to bitter-tasting greens. If you prefer conventional fertilizers, choose a balanced formula with equal parts nitrogen, phosphorus, and potassium.
Weed Management
Weeds can quickly overrun your spring mix, competing for water and nutrients. Regularly remove weeds by hand or use a hoe to gently loosen the soil around your plants. Mulching with straw or shredded leaves can suppress weeds while retaining soil moisture. Staying ahead of weeds will keep your greens healthy and stress-free.
Harvesting Spring Mix: Timing and Techniques
Knowing when and how to harvest your spring mix ensures a steady supply of fresh, flavorful greens. Here’s how to do it right.
When to Harvest
Spring mix is ready to harvest when the leaves reach 4-6 inches in height, usually 3-4 weeks after planting. Harvesting at this stage ensures tender, flavorful greens. If you prefer baby greens, pick them earlier, while waiting longer will result in heartier leaves. Keep an eye out for signs of bolting—when the plants start to flower—as this can make the greens bitter.
How to Harvest
To encourage regrowth and prolong your harvest, use the “cut-and-come-again” method. Trim the outer leaves with clean scissors, leaving the inner leaves and about 1-2 inches of the plant intact. This allows the plant to regrow for multiple harvests. For a full harvest, cut the greens about an inch above the soil line, ensuring the root systems remain undisturbed. Always harvest in the early morning or evening to keep the greens crisp and fresh.
Post-Harvest Storage
Once harvested, rinse the greens gently under cool water to remove dirt. Pat them dry with a clean towel or use a salad spinner to remove excess moisture. Store the greens in an airtight container or plastic bag lined with a paper towel to absorb humidity. Refrigerated properly, spring mix can stay fresh for up to a week.
Troubleshooting Common Problems
Spring mix is generally easy to grow, but even seasoned gardeners encounter a few challenges. Here’s how to address common issues and keep your greens thriving.
Why Does Spring Mix Bolt?
Bolting occurs when plants produce flowers and seeds prematurely, often due to heat stress or inconsistent watering. This process makes the greens taste bitter. To prevent bolting, plant your spring mix in cooler seasons or use shade cloth to reduce heat exposure. Also, regularly harvest leaves to delay flowering and keep the soil consistently moist but not waterlogged.
Why Can’t Spring Mix Tolerate Heat?
Spring mix struggles in high temperatures, which can lead to wilting or poor growth. To manage heat stress, water deeply in the morning to keep the soil cool and mulch around plants to retain moisture. For gardeners in warmer climates, consider planting heat-tolerant varieties or growing in a shaded location.
Why Does Spring Mix Turn Bitter?
Bitterness can result from bolting, underwatering, or over-fertilizing, while yellowing leaves often indicate nutrient deficiencies or overwatering. To fix bitterness, maintain regular watering and harvest leaves promptly. If leaves yellow, check soil moisture levels and add a balanced organic fertilizer if needed.
Pest and Disease Issues
Common pests like aphids, slugs, and flea beetles can damage spring mix. Use natural remedies like neem oil for aphids and crushed eggshells to deter slugs. For diseases like powdery mildew, ensure good air circulation by thinning plants and avoid overhead watering. Organic solutions, such as a baking soda spray, can also help manage fungal issues.
Tips for Year-Round Spring Mix Growth
With a few smart strategies, you can enjoy fresh spring mix greens no matter the season. Here’s how to extend your growing season and maintain a continuous harvest.
Growing Indoors or in Containers
Spring mix thrives indoors or in containers, making it a versatile choice for year-round gardening. Use a wide, shallow container with good drainage and fill it with nutrient-rich potting soil. Place the container in a sunny spot, such as a south-facing window, or use grow lights to provide 12-14 hours of light daily. Indoor gardening offers better control over temperature and pests, ensuring fresh greens even in winter.
Extending the Growing Season
To protect your spring mix from frost or excessive heat, consider using row covers, shade cloth, or a small greenhouse. Row covers trap warmth during cool months, while shade cloth reduces sun intensity in hot weather. In colder regions, a cold frame or hoop house can extend your growing season well into winter. These tools help maintain consistent conditions, ensuring steady growth.
Succession Planting for Continuous Harvests
Planting seeds at intervals of 2-3 weeks ensures you always have fresh greens to harvest. As one batch matures, the next will be ready to replace it. Succession planting works well in both garden beds and containers, maximizing your yield throughout the year.