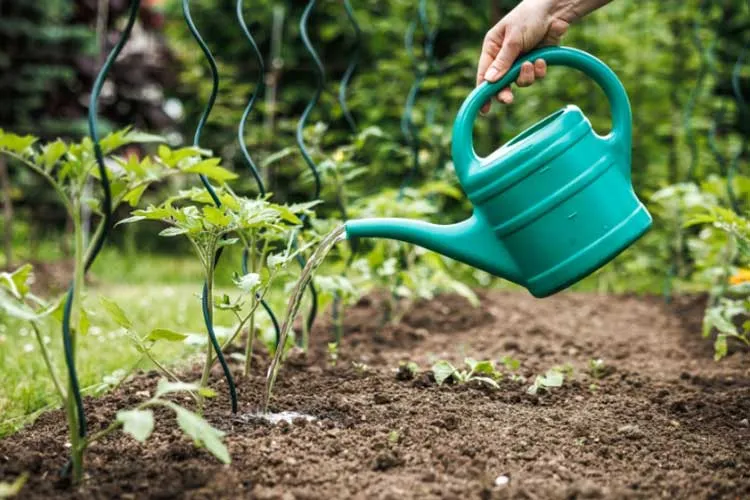
Fertilizing a vegetable garden without wasting money starts with knowing exactly what your soil and plants need—and when. Most gardeners overdo it, buying expensive fertilizers that either go unused or wash away before they help. Excess fertilizer is one of the leading causes of weak plant growth, poor harvests, and runoff pollution.
If your tomatoes look lush but won’t fruit, or your lettuce bolts early, improper feeding could be the cause.
This guide breaks down the best ways to fertilize a vegetable garden with precision, saving you money and getting real results. Whether you’re working with containers, raised beds, or in-ground plots, each tip is designed to stretch your budget and boost your yields without guesswork or waste.
Know What Your Soil Needs First
Before you buy a single bag of fertilizer, grab a simple soil test. Many gardeners skip this step, wasting money on fixing problems they don’t even have. You can find affordable soil test kits at garden centers or get a low-cost analysis from your local extension office. These tests tell you exactly what your soil has—and what it’s missing—so you’re not throwing nutrients (and dollars) down the drain.
Nitrogen, phosphorus, and potassium (labeled N-P-K on fertilizer bags) are the three main nutrients plants need. But they don’t all need the same amount. For example, if your soil is already rich in nitrogen, adding more can backfire, especially on crops like peas and beans that naturally make their own. Too much nitrogen can also mean lush leaves but few fruits or roots. That’s why knowing your soil’s NPK levels up front gives you a real edge.
Not every part of your garden is the same. Raised beds, in-ground plots, and container gardens can each have different nutrient levels, even if they’re only a few feet apart. One bed might be short on potassium while another is already overloaded. That’s why testing each zone separately saves you from blanket fertilizing that might do more harm than good.
Once you’ve amended your soil based on the results, give it time to settle in. Fertilizers and soil boosters don’t work overnight. Keep an eye on your plants for a couple of weeks and see how they respond. If leaves perk up and growth takes off, great—you’re on track. If not, hold off before adding more. Over-correcting can cause new problems, such as pH swings or nutrient lockout, where excessive amounts of one nutrient prevent the plant from utilizing other essential nutrients.
Use the Right Fertilizer at the Right Time

Fertilizer isn’t one-size-fits-all, especially if you want healthy, productive plants. Timing matters as much as type. Leafy greens like lettuce, spinach, or kale benefit most from nitrogen early in the season when they’re growing fast. But once your tomatoes, peppers, or squash start to flower, they shift gears and need more phosphorus and potassium to set fruit. Using the wrong nutrient at the wrong time can result in numerous leaves and a very small harvest.
Too much of a good thing can backfire quickly. Overfeeding your garden might seem like a shortcut to faster growth, but it usually weakens the plants instead. You might see scorched leaf edges, drooping stems, or worse—nutrient runoff that washes away into storm drains. It’s smarter (and cheaper) to go light. Most fertilizers come with dosage instructions on the label—follow them and resist the urge to add a little extra.
When selecting a fertilizer, especially synthetic types, proceed with caution. These products are often concentrated, and even a small scoop packs a punch. If you’re growing a mix of plants in one bed, look for a balanced blend, such as 10-10-10 or 5-5-5, to ensure optimal growth. Save single-nutrient fertilizers for when your soil test shows a clear need; otherwise, you risk tipping the balance too far in one direction.
Watch your plants before reaching for the fertilizer bag. Yellow leaves, curling tips, or stunted growth may indicate nutrient deficiencies, but watering problems, pests, or temperature fluctuations could also cause these issues. Check the basics first. If you’re certain the soil is lacking in nutrients, add a gentle dose and observe how the plants respond over the next week or two.
Compost: The Cheapest Fertilizer You Can Make
If you’re looking for a low-cost, no-waste way to feed your garden, compost is hard to beat. Your kitchen scraps—things like fruit peels, vegetable trimmings, coffee grounds, and eggshells—can all turn into rich, slow-release fertilizer right in your backyard. Unlike store-bought options, compost feeds your plants gradually and naturally without the risk of burning roots.
Start by spreading compost over your garden beds in early spring, then top-dress around plants during the growing season. You don’t have to dig it in—layer it like mulch. It improves soil structure, retains moisture, and nourishes beneficial microbes that aid in the absorption of essential nutrients by roots. The more often you use it, the better your soil becomes over time.
Need a quick pick-me-up for struggling plants midseason? Try compost tea. Soak a shovelful of finished compost in a bucket of water for one to two days, then stir it. Next, strain and pour the liquid around the base of your plants or spray it on the leaves. It’s an easy way to give your garden a nutrient boost without spending extra money.
A healthy compost pile needs balance. Aim for about two parts brown (like dry leaves, paper, or cardboard) for every part green (fresh scraps, coffee grounds, or grass clippings). This mix helps prevent your pile from becoming too wet or smelly and accelerates its breakdown. If it’s too slimy or stinks, add more browns and turn it to let in air.
Make Use of Free or Low-Cost Organic Fertilizers
You don’t have to spend big to feed your plants well. Some of the best fertilizers are already in your kitchen or yard. Banana peels and crushed eggshells are packed with potassium and calcium, two nutrients that fruiting plants like tomatoes and peppers love. Chop them into small pieces and bury them a few inches deep near the roots. Just don’t dump too much in one spot, or you’ll risk attracting pests or creating an imbalance.
Grass clippings and used coffee grounds are another budget-friendly option. Both are high in nitrogen and help give leafy crops a strong start. Sprinkle lightly around plants or mix into your compost pile. If you’re using them fresh, spread thin layers so they don’t mat down or create soggy patches that block air and trap moisture.
Here’s the interesting part—some gardeners swear by weed tea or diluted urine for a nitrogen boost. Although it may sound unusual, these options can be effective when used carefully. Weed tea is made by soaking unwanted greens in water for a few days and then straining the liquid for use around hardy plants. If using urine, make sure it’s diluted at least 10:1 with water and only used on ornamental or non-edible plants to be safe.
Combining DIY fertilizers with compost or mulch makes them even more effective. The compost helps regulate the release of nutrients and maintains a balanced soil biology, while the mulch locks in moisture and prevents nutrients from washing away. This combo supports healthy root zones and maximizes the benefits of your homemade efforts.
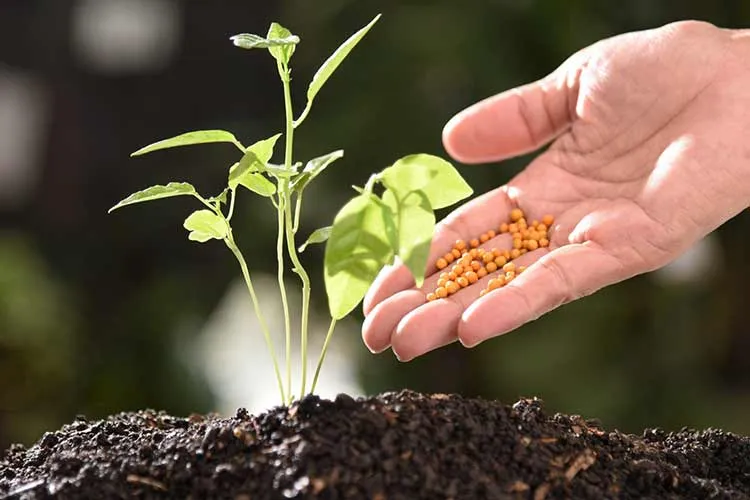
Buy Concentrates or Slow-Release Options That Last Longer
If you do need to buy fertilizer, look for options that stretch your dollar. Granular fertilizers usually last much longer than liquid ones. You can sprinkle a small amount near the base of your plants, and it will slowly release nutrients over several weeks. Liquids, on the other hand, often need to be reapplied every week or two, especially after watering or rainfall.
Slow-release organic fertilizers are a smart buy for steady feeding. Products like feather meal, bone meal, blood meal, or alfalfa pellets break down over time and won’t wash away in the first summer downpour. They’re especially helpful in raised beds or sandy soil where nutrients tend to leach out fast.
Buying concentrates can also save money. A gallon of liquid seaweed or fish emulsion may seem pricey upfront, but when diluted properly, it lasts throughout the entire season. Most bottles make dozens of gallons of usable mix—enough to feed a small garden through spring, summer, and fall. Be sure to check the label for the correct mix ratios and storage instructions.
Storage makes a difference, too. Keep bags of fertilizer sealed tightly in a dry, cool place, away from direct heat and moisture. For homemade blends, label the container with the date and what’s inside. That way, you’re not guessing months later or tossing out a mix that’s gone bad. Good storage habits help you get the most out of what you buy.
Don’t Fertilize What Doesn’t Need It
Not every plant in your garden needs a boost. Crops such as peas, beans, radishes, and many native greens can thrive in average soil. Peas and beans even produce their nitrogen, so adding more can harm them. Instead, save your fertilizer for heavy feeders like tomatoes, corn, or brassicas, which draw more nutrients from the soil and respond well to extra help.
Feeding plants late in the season often does more harm than good. Once your crops start to flower, fruit, or go to seed, extra fertilizer can confuse their natural cycle. Instead of ripening, they may continue to produce leaves or attract unwanted pests. It’s better to ease off and let the plant focus on finishing strong.
Pay close attention to plant signals. If your tomatoes have all leaves and no fruit, or if cucumbers have curling leaves and no flowers, it might be due to excessive fertilizer, not insufficient. Lush growth without results is a classic sign you’re overfeeding. Back off and let the plant rebalance.
Try grouping your crops by feeding needs. That way, you can treat each section of your garden differently instead of applying the same amount everywhere. Put heavy feeders together and keep light feeders in their bed, and you’ll save money and avoid waste. It also makes tracking what you’ve fed and when a lot easier.
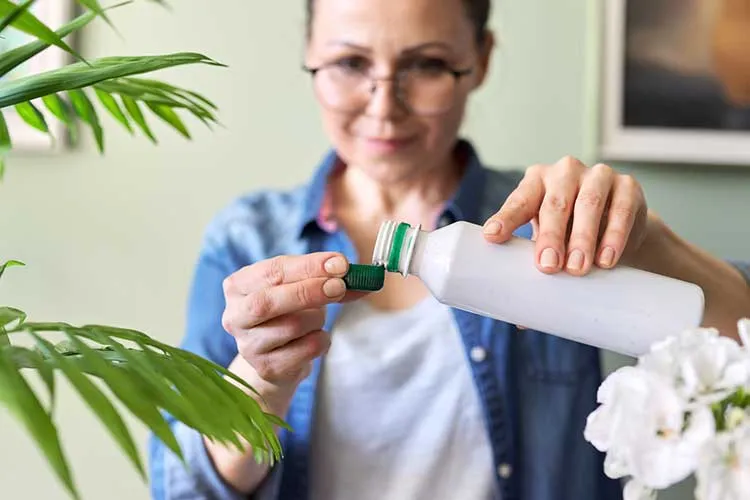
Use Foliar Feeding Only When It Makes Sense
Foliar feeding—spraying liquid nutrients directly onto leaves—can give your plants a fast pick-me-up, but it’s not a cure-all. It works best during short windows, such as immediately after transplanting, during flowering, or when you notice an early deficiency. Since leaves absorb nutrients quickly, foliar sprays can help bridge the gap until your soil catches up.
Timing is everything. Only spray in the early morning or late evening when the sun is low. Midday applications can burn leaves, especially on hot days, and most of the spray evaporates before it can help the plant. A gentle mist is plenty—soaking the leaves isn’t necessary and can invite disease.
Stick with natural products when spraying on leaves. Compost tea, diluted fish emulsion, or seaweed extract are safer choices that won’t harm tender foliage. Synthetic fertilizers tend to be too harsh for foliar use and can scorch delicate plants if mixed too strongly or applied at the wrong time.
Don’t make foliar feeding a routine unless there’s a clear reason. It’s meant to support, not replace, soil feeding. A light mist every few weeks is enough if you’re using it preventatively. If your plants are healthy and growing strong, you likely don’t need to spray at all.
Smart Growing Tips & Insight
8 Garden Raised Beds That Are Best for Tomatoes
Easy-to-Grow Plants to Keep Pests Away From Your Garden
How to Clean Pruning Shears After Use to Prevent Plant Diseases