More people than ever are trying to grow food at home, but what if you don’t have a backyard or rich garden soil? Whether working with a sunny balcony, a cramped patio, or just a few feet of sidewalk space, you can still harvest fresh, homegrown vegetables right outside your door. Vegetables for Container Gardening is a practical and flexible way to grow real food in tight quarters. Still, many beginners give up after dealing with spindly plants, low yields, or confusing advice.
The good news is that some vegetables are perfectly suited for containers, and knowing which ones to grow is the first step to creating a garden that produces.
So, which vegetables are best to grow in pots? This guide answers that exact question with practical advice for results-driven gardeners. You’ll learn how to choose crops that thrive in containers, set them up for success, and enjoy fast, flavorful harvests without needing a full garden plot.
Keep reading if you’re ready to turn your porch, balcony, or stoop into a productive food garden. This guide was made for you.
The Best Vegetables to Grow in Pots That Thrive
Not all vegetables are worth the trouble in small containers. The trick is to grow compact, productive, and quick-to-mature plants. These vegetables not only handle the limits of pot life—they often do better in containers where you can control soil, moisture, and sun exposure.
Let’s break it down by category:
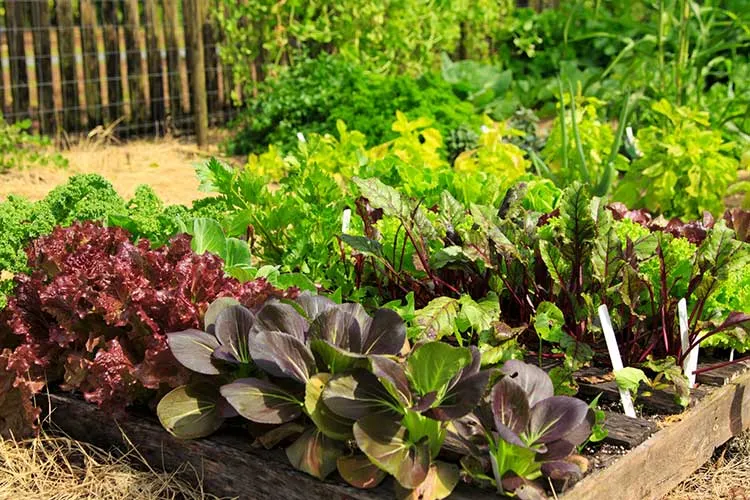
Leafy Greens: Fast, Forgiving, and Always in Season
Leafy greens are some of the easiest vegetables to grow in containers. Varieties like lettuce, spinach, and arugula thrive in shallow pots and mature quickly, often in as little as 30 days. You can snip the outer leaves for cut-and-come-again harvesting, keeping your salad bowl full all season long. Plus, they tolerate partial sun, making them great for balconies or shady corners.
Root Crops: Small Space, Big Flavor
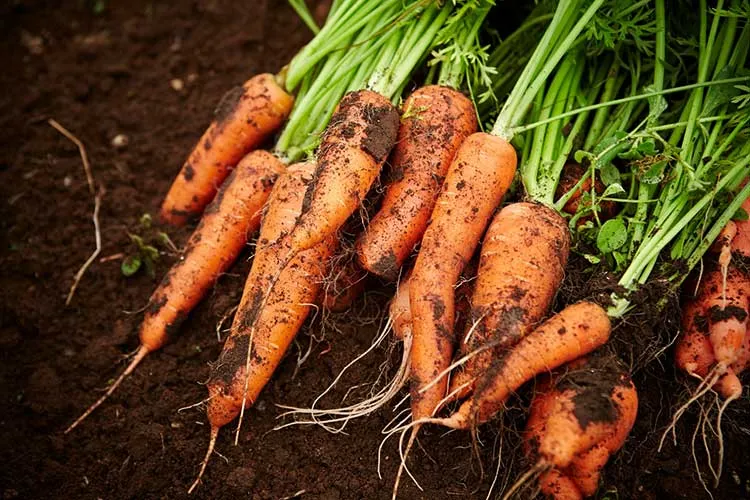
If you want to grow underground, stick to short-season, small-rooted varieties. Radishes top the list—they’re the quickest vegetable to grow, with some maturing in just 25 days. Carrots can also work well in deep pots, especially short varieties like ‘Thumbelina’ or ‘Parisian’. Beets are another good option, offering both edible roots and leafy tops. Ensure your containers are at least 10-12 inches deep to give roots room to grow.
Fruiting Plants: The Right Types Matter
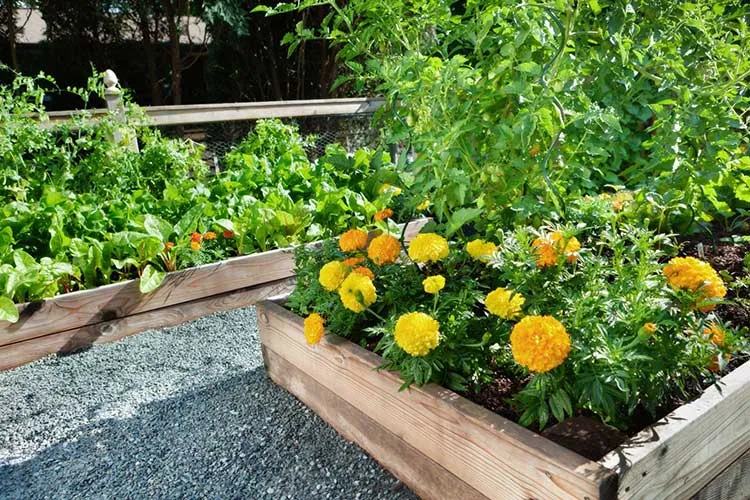
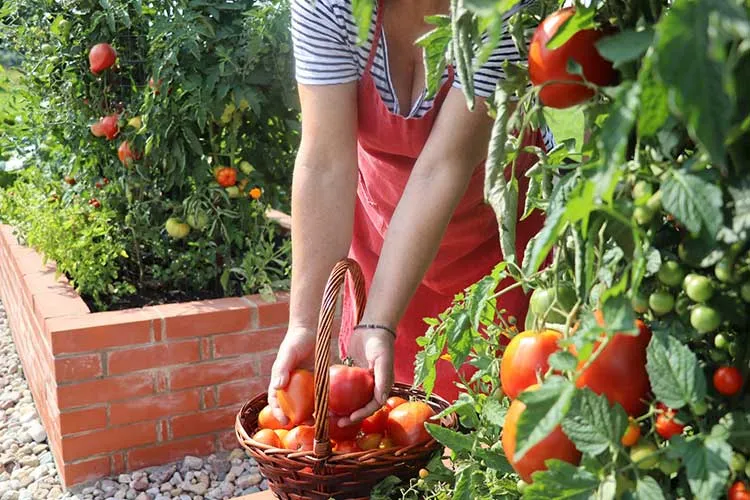
You can grow heavy-hitters like tomatoes and peppers in containers, but pick compact or bush varieties. Cherry tomatoes and bush peppers are perfect, especially when paired with a stake or cage for support. Bush beans also do well in pots and don’t need trellising, making them an ideal container crop for beginners. These fruiting plants need full sun and regular feeding, but the reward is worth it.
Herbs: The Easiest Wins of All
If you’re looking for a guaranteed win, start with herbs. Basil, chives, and parsley grow well in small pots and love regular harvesting. They’re also some of the best value per square inch—just a few plants can replace expensive store-bought bunches. Keep them near your kitchen or windowsill, and you’ll always have flavor at your fingertips.
Container Sizing Made Easy – How Deep and Wide Your Pots Should Be
Regarding container gardening, the size of your pot can make or break your harvest. Too shallow, and the roots can’t stretch. Too cramped, you’ll get stunted growth or no harvest. The goal is to match your vegetable’s root system to the right depth and width of the container.
Understanding Root Needs
Different vegetables send their roots in different directions. Leafy greens and herbs tend to have shallow roots, while fruiting vegetables like tomatoes and peppers grow deeper and wider root systems. If your plant can’t grow the roots it needs, it simply won’t produce well.
General Size Guide
Here’s a quick visual guide to help you pick the right pot for each type of crop:
| Vegetable Type | Example Crops | Ideal Container Depth | Minimum Width |
|---|---|---|---|
| Leafy Greens | Lettuce, Spinach, Arugula | 6–8 inches | 10–12 inches |
| Root Crops | Radishes, Carrots, Beets | 10–12 inches | 12 inches+ |
| Fruiting Plants | Tomatoes, Peppers, Beans | 12–18 inches | 14–16 inches+ |
| Herbs | Basil, Chives, Parsley | 6–8 inches | 6–10 inches |
You don’t need designer planters. Buckets, tubs, and repurposed bins can all work if they hit these size targets and have good drainage.
What is the Ideal Size of Container for Fruiting Vegetables?
Fruiting crops like tomatoes, peppers, and cucumbers need room to grow. The minimum is a 5-gallon pot (about 12 inches across and 12 inches deep). For larger yields, aim for 7 to 10 gallons. This allows the roots to expand and supports stable growth during flowering and fruiting.
Going Bigger is Usually Better
If you’re unsure between two sizes, go with the larger container. Bigger pots hold more soil, which means better moisture retention and more nutrients available for your plant. It also gives you some buffer against heat and dry spells.
The Smart Soil Strategy – Best Potting Mixes for Healthy, Productive Plants
Your plants live and breathe through their soil—so don’t treat it as an afterthought. Unlike garden beds, containers can’t rely on underground ecosystems or composting worms. The soil you start with greatly affects how well your vegetables grow.
What Makes a Good Container Mix?
You want a light mix that drains well and holds just enough moisture. Regular garden soil is too heavy and can suffocate roots. Instead, use a potting mix—not topsoil—that includes ingredients like peat moss, coco coir, perlite, or vermiculite.
The ideal mix:
- Drains quickly, so roots don’t rot
- Holds moisture so plants don’t dry out too fast
- It is light and fluffy, which lets air flow to the roots
- Includes slow-release nutrients or organic matter
Look for bags labeled “container mix” or “potting mix,” not “garden soil” or “raised bed soil.”
DIY Potting Mix Recipe
You can mix your own if you want to save money or have several pots to fill. Here’s a simple recipe:
- 1 part coconut coir or peat moss
- 1 part compost (homemade or bagged)
- 1 part perlite or coarse sand
Mix it well in a wheelbarrow or tarp. To give plants a strong start, add a handful of worm castings or a slow-release fertilizer.
Do I Need to Change the Compost in My Pots Every Year?
Not completely. At the end of the season, remove dead roots and the top few inches of soil. Then fluff up what’s left and mix in fresh compost or fertilizer. This refreshes nutrients without wasting what’s still usable. After 2–3 seasons, it’s smart to replace the mix fully, especially if growth has slowed or the soil gets compacted.
Keep Your Soil Alive
Avoid letting your containers go bone-dry between plantings. Moisture helps maintain the soil’s structure and micro-life. Keep pots covered or lightly watered between seasons, even if you’re not actively growing. That way, your next crop will have a head start.
Feeding from the Ground Up – Best Fertilizers for Container Vegetables
In a container, your plants can only access the nutrients you provide—once the soil’s used up, there’s nowhere else to go. Regular feeding differs between lush, productive plants and sad, scraggly stems. The good news? You don’t need fancy products or a chemistry degree to keep your plants well-fed.
What Is the Best Plant Food for Container Gardens?
It depends on what you’re growing. Leafy greens love nitrogen-rich fertilizers that encourage leafy growth. Fruiting crops like tomatoes and peppers need phosphorus and potassium to support blooms and fruit production.
For leafy greens (like lettuce, spinach, herbs):
- Use a balanced fertilizer like 10-10-10 or a high-nitrogen organic option like blood meal or fish emulsion.
For fruiting vegetables (like tomatoes, peppers, beans):
- Choose a fertilizer higher in phosphorus and potassium—look for labels like 5-10-10 or “tomato feed.”
When and How Often to Feed
Most potting mixes start with a short supply of nutrients, but those fade quickly. Start feeding about 2–3 weeks after planting, then continue every 2–3 weeks, depending on the type of fertilizer and how fast your plants are growing. Water-soluble fertilizers work fast but wash out quickly. Slow-release types feed gradually, which is great for forgetful gardeners.
A quick tip: Always water your plants before applying fertilizer to prevent root burn.
Organic vs. Synthetic Fertilizers
Organic options build soil health and feed gradually. Compost tea, fish emulsion, seaweed extract, and worm castings are great choices, especially for leafy greens and herbs.
Synthetic fertilizers work faster and deliver exact nutrients, but they don’t improve soil structure or biology. If you’re growing food organically or want a long-term soil strategy, stick with natural feeds.
What Is the Best Homemade Fertilizer?
You can make simple plant food with kitchen scraps:
- Banana peel tea (soak chopped peels in water for 2–3 days) adds potassium
- Compost tea gives a nutrient boost and friendly microbes
- Crushed eggshells supply calcium for tomatoes and peppers
Just be sure not to overload your soil with too much of any one thing. Mixing homemade and store-bought options can keep your feeding plan balanced and budget-friendly.
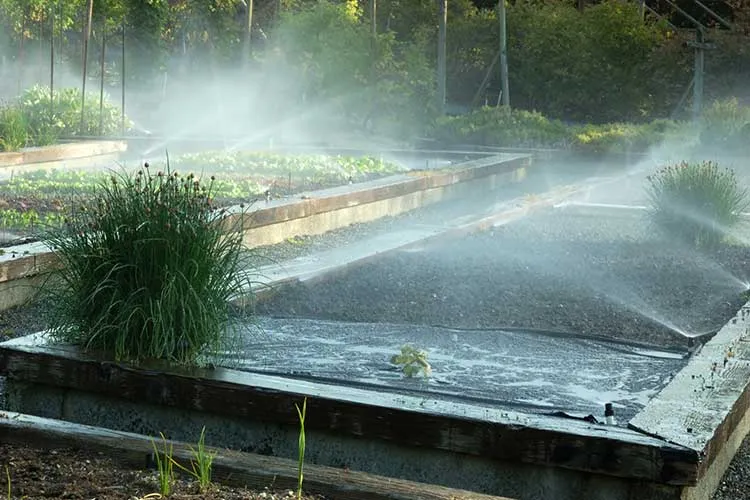
Watering Like a Pro – Avoiding the #1 Container Gardening Mistake
If there’s one issue that ruins more container gardens than any other, it’s watering—too much or too little. Unlike garden beds, containers dry out quickly and have no backup water source. But there’s a fix: learn the signs and set up simple routines to avoid watering guesswork.
What Is the Most Common Mistake Made with Container Plants?
Poor drainage. Many containers don’t drain well, or gardeners forget to drill holes in the bottom. This leads to soggy roots and root rot, slowly killing the plant. Always use containers with drainage holes and avoid saucers that trap standing water.
On the flip side, underwatering is also common. Soil in containers dries out fast, especially in warm weather or full sun. By the time the leaves wilt, the roots may already be stressed.
Smart Watering Tips
- Stick your finger into the soil—if the top inch is dry, it’s time to water.
- Water deeply until it runs from the bottom. This encourages strong roots and flushes out excess salts.
- Morning is the best time to water, so plants stay hydrated through the day’s heat.
Tools That Make It Easier
- Moisture meters are cheap and take the guesswork out.
- Self-watering containers have a reservoir at the base that keeps roots moist longer.
- Drip irrigation kits with timers can automate watering for larger setups.
If your schedule’s unpredictable, mulching the soil surface with straw or bark can also help slow evaporation.
Avoiding Stress from Water Swings
Try not to let your containers dry out completely between waterings. A dry-wet cycle can stress plants and lead to poor growth or blossom drop, especially for tomatoes, cucumbers, and peppers. Consistency is key.
Picking the Right Pots – Which Containers Work Best and Why
The type of pot you use matters more than most beginners realize. It affects how fast soil dries out, how roots grow, and how well your plants stay upright. But you don’t need to spend a fortune—many great options are affordable or free.
What Is the Number One Plant Container?
There’s no single best container for every crop, but fabric grow bags often come close. They’re breathable, prevent overwatering, and are easy to move around. For vegetables like tomatoes, peppers, and potatoes, a 5–10 gallon grow bag gives plenty of root room and drains well without compacting the soil.
Common Container Types: Pros and Cons
- Terracotta: Attractive and sturdy, but dries out quickly. Better for herbs or drought-tolerant plants.
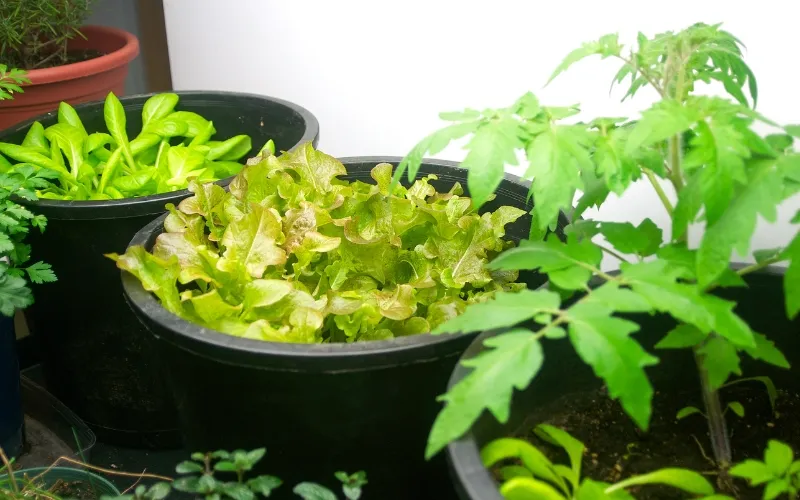
- Plastic pots: Lightweight, inexpensive, and retain moisture well. Just make sure they have drainage holes.
- Fabric grow bags promote strong root systems and air flow. They are excellent for veggies, but they do dry out faster.
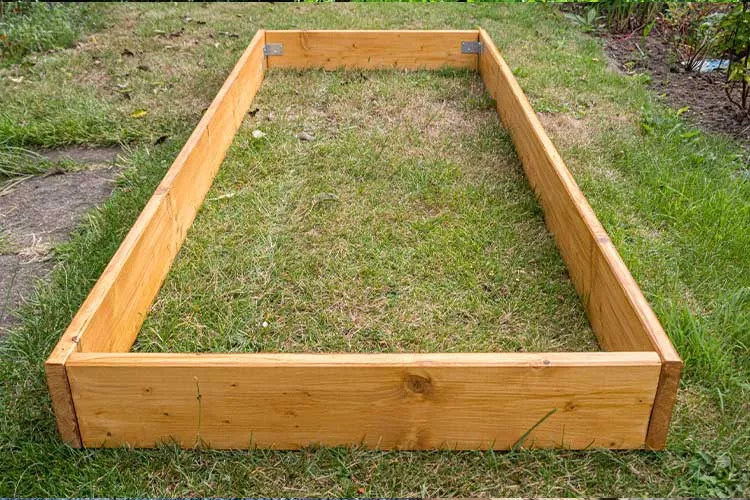
- Wooden boxes: Great for larger setups. Line them with plastic (with holes) to prevent rot.
- Upcycled containers: Buckets, totes, and even old drawers can work. Drill drainage holes and ensure they’re food-safe.
Size, Color, and Shape
- Color matters in hot climates—dark pots absorb heat and can overheat roots. Go with light colors when gardening on a sunny balcony or patio.
- Shape matters less than size, but avoid narrow containers that can tip over or restrict root growth.
What Is the Cheapest Way to Have a Container Garden?
Reusing materials is your best bet. 5-gallon buckets from hardware stores or restaurants (with holes drilled in the bottom) are ideal for tomatoes, peppers, and beans. Yogurt tubs or salad boxes make good mini-gardens for greens and herbs. Local Buy Nothing groups or garden swaps are great places to score free containers.
Get More From Less – How to Group Vegetables in Containers for Bigger Yields
Space is tight in container gardens, so make every inch count by grouping your vegetables wisely. The right combinations can boost harvests, reduce pests, and simplify watering.
How Should You Group Plants in Containers?
The key is to match plants by size, root depth, and growing needs. Don’t just cram random veggies into one pot—think compatibility.
Companion Planting in Containers
Some plant pairs naturally help each other grow. Try these popular combos:
- Tomatoes + Basil: Basil repels pests, boosts tomato flavor, and fits nicely under the taller plant.
- Carrots + Onions: Carrots grow downward while onions grow outward, so there is no competition for space.
- Lettuce + Radishes: Radishes grow fast and loosen the soil; lettuce fills in afterward.
Avoid pairing plants that fight for resources, like peppers and tomatoes, in the same pot unless the pot is very large.
Pairing by Water and Nutrient Needs
Plants in the same pot should want the same things. Tomatoes and basil both love consistent water and warmth. But rosemary, which prefers dry soil, won’t be happy next to thirsty lettuce.
If one plant is a heavy feeder and the other isn’t, they can throw each other off balance. To keep nutrients steady across the board, use slow-release fertilizers when mixing crops.
Avoiding Overcrowding
Cramming too many plants into one pot can lead to poor air flow, leggy growth, and lower yields. Give each plant enough room for its mature size—even if it looks like a lot of space initially. Crowded roots mean weak harvests.
A good rule of thumb:
- 1 tomato or pepper per 5–10 gallon container
- 4–6 lettuce plants per 12-inch-wide pot
- 9–16 carrots per square foot of surface area (in a deep container)
Visual Planning Helps
Use square or rectangular containers to create mini “beds” for mixed planting. For example:
- Back row: bush beans
- Middle: compact basil or parsley
- Front edge: trailing nasturtiums (which also deter pests)
You’ll get food, flowers, and fewer bugs in one neat setup.
Stay Ahead of Problems – Common Challenges and How to Fix Them Fast
Container gardens may be simpler than in-ground beds, but they’re not problem-free. Nutrient loss, pests, wind, and heat can all take a toll if you’re not paying attention. The good news? Most issues can be fixed quickly once you spot the signs early.
Disadvantages of Container Gardening?
One of the biggest downsides is that nutrients leach out faster than they do in the ground. Essential minerals can wash away every time you water, leaving your plants underfed, even if the soil looks fine. Unlike in a garden bed, there’s no natural underground buffer to replenish those nutrients.
The fix: add compost or organic fertilizer every few weeks, especially for heavy-feeding crops like tomatoes, peppers, or squash. A liquid feed between deep waterings also helps keep things balanced.
Exposure to Wind and Heat
Containers on balconies or patios often face direct sun, reflected heat, or gusty winds. This dries out the soil quickly and stresses the plants. Tomatoes and leafy greens are especially sensitive to sudden heat swings or dry air.
Use a shade cloth during peak summer heat or move pots to a slightly sheltered spot during windstorms. Rolling planters or pot caddies make it easy to adjust locations as the weather shifts.
Pests in Small Spaces
Don’t let the lack of dirt fool you—pests can still appear. Aphids, whiteflies, and spider mites often target container plants, especially if the setup is crowded or air circulation is poor.
To fight back:
- Spray with neem oil or insecticidal soap at the first sign of pests
- Remove yellow or damaged leaves quickly
- Try companion plants like marigolds or nasturtiums to deter bugs naturally
Raised containers also help keep slugs and snails at bay, especially when elevated on bricks or stands.
What Are the Most Difficult Vegetables to Grow in Containers?
Some crops don’t love pots. Corn, asparagus, pumpkins, and melons all need lots of space to spread, deep roots, and consistent moisture. If you have large containers or raised beds, skip these for now.
Also tricky are broccoli and cauliflower. These need cool temperatures and lots of nutrition. Unless conditions are just right, they’re prone to bolting or forming small, underdeveloped heads in a pot.
While you get comfortable, stick with forgiving crops like greens, bush beans, peppers, and herbs. Then, if you’re feeling ambitious, add one or two “challenge crops” next season in larger containers.
Simple Rules of Thumb for Foolproof Container Success
Container gardening isn’t about perfection—it’s about consistency. Following a few simple habits increases your chances of success, even if you’re new to growing vegetables.
What Is the Rule of Thumb for Container Gardening?
There are a few! These quick-reference tips can help you troubleshoot most common issues and build a working routine.
- One Plant per Pot—Unless It’s Small
Large plants like tomatoes, peppers, or eggplants need their container (at least 5 gallons). You can group several in a wider container for smaller crops like radishes, lettuce, or herbs. Just make sure they have similar watering needs. - Drainage Is Non-Negotiable
Every pot needs drainage holes. If your container doesn’t have them, make them. Place a mesh screen or a small rock over each hole to keep soil from washing out. - Full Sun Means 6–8 Hours Minimum
Most vegetables need plenty of direct sunlight to grow. South—or west-facing spaces are best. If your area only gets partial sun, focus on leafy greens and herbs, which are more shade-tolerant. - Feed Every Few Weeks
Even the best potting mix runs out of nutrients. Set a reminder to fertilize every 2–3 weeks during the growing season. - Water Deeply, Not Frequently
Instead of daily sprinkles, water until you see it run out of the drainage holes. This encourages deep roots and reduces the risk of disease.
Quick Checklist for Healthy Containers
- ✅ Pot has drainage holes
- ✅ Correct container size for plant type
- ✅ Soil is light, fresh, and well-draining
- ✅ Plants get enough sun
- ✅ Watering is consistent (check moisture with your finger or a meter)
- ✅ Fertilizer added every few weeks
- ✅ Leaves look healthy and upright
Stay in Tune With Your Plants
You don’t need to hover over your plants daily, but take a few minutes a couple of times a week to check in. Look at the leaves, feel the soil, and peek under leaves for pests. Small changes can help you fix problems before they get worse.
Conclusion & Next Steps
Vegetables for Container Gardening don’t have to be complicated, expensive, or time-consuming. When you choose the right vegetables, match them with the right pot and soil, and stick to a few simple habits, you’ll be surprised how much food you can grow in even the smallest spaces.
Start small. Try one leafy green, one herb, and one fruiting vegetable. As your confidence grows, so will your harvests.
Want to go further? Check out our related posts on:
17 Easy Ways to Stop Your Dog from Eating Your Plants
7 Best Microgreens to Grow Indoors with Quick Results
20 Practical Tips to Keep Your Raised Bed Soil Healthy All Season