If your microgreens are wilting, growing unevenly, or showing signs of mold, your watering routine is likely the problem. Microgreens have shallow roots and grow fast—just a few hours of dryness or excess moisture can ruin an entire tray. Overwatering causes rot and mold, while underwatering stunts growth or kills seedlings. Proper watering is the single most important factor for healthy, mold-free harvests.
This guide explains how to water microgreens correctly, providing step-by-step instructions on when to water, how much, and which tools to use. It’s built for beginners but detailed enough to improve any home setup. Mastering watering is where it all starts if you want consistent results and crisp, vibrant greens.
Understanding Microgreens and Their Watering Needs
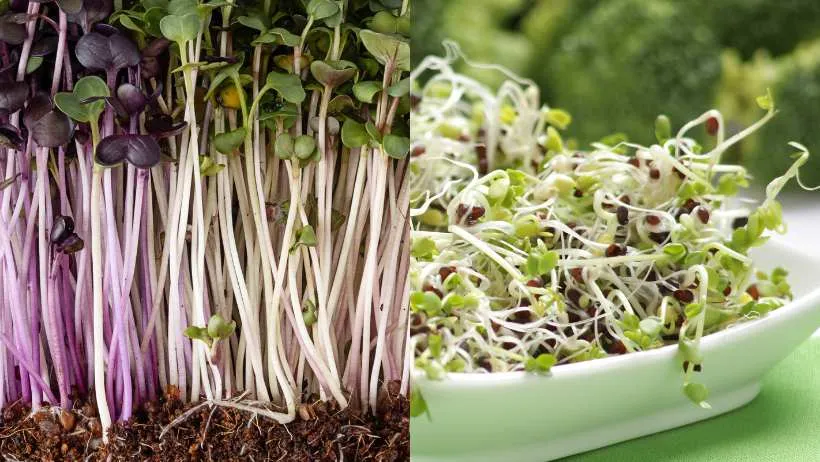
Microgreens grow quickly—most are ready to harvest in 7 to 14 days. Because they don’t stay in their growing medium long, their roots stay shallow and delicate the whole time. That makes them extremely sensitive to how much water is available. If the medium dries briefly, you’ll see wilting or stunted growth within hours. On the other hand, if it stays too wet, you risk damping off, mold, and root rot.
Different microgreens grow at different speeds and use water differently. Radish and broccoli, for example, germinate quickly and shoot up in just a few days. They tend to drink more water early on, especially once germination finishes. Slower growers like basil or amaranth take longer to sprout and prefer consistently moist, not wet, conditions. If the water fluctuates too much, their germination rate can drop or the stems may stay thin and weak.
Since every variety responds to moisture differently, a one-size-fits-all watering schedule doesn’t work. What does work is understanding how fast each type grows and adjusting your moisture habits to match. Once you’ve got that down, spotting early warning signs and acting fast to keep things on track becomes much easier.
4 Factors That Change How Often You Water
How often you water your microgreens depends on more than the time of day. Several factors, like your growing medium, tray setup, and environment, affect how fast moisture evaporates or drains.
Growing Medium makes a big difference. Soil and coconut coir hold moisture well and release it slowly, which helps prevent drying out too fast. Coir is especially beginner-friendly because it’s clean, neutral, and holds water evenly. In comparison, hemp mats or felt dry out quicker and don’t hold much water, so they often need more frequent watering. Hydroponic setups need a different approach, relying on misting or controlled bottom feeding.
Tray Setup also matters. If your trays have no drainage holes, it’s easier to overwater, so you must be more careful about quantity. Trays with proper drainage let you use bottom watering safely, which helps avoid mold. Humidity domes or blackout lids can trap moisture during early germination, meaning you may not need to water again for a few days. But once they come off, evaporation increases.
Environmental Conditions can quickly shift your routine. Trays might dry out twice as fast as in a cool, still space in a warm, dry room with lots of airflow. Strong grow lights also speed up evaporation. On the other hand, high humidity can keep the surface too damp, increasing the risk of mold. Monitor room temperature and airflow to determine how often trays need attention.
Variety-specific needs round out the list. Pea shoots are thirsty and grow tall, so they need steady bottom watering to fuel their size. Mustard greens grow fast, too, but their thin stems mean they can suffer from overwatering just as easily. Each crop has its rhythm, so it helps to group similar varieties or monitor each tray closely.
Here’s a quick reference to get you started:
| Microgreen Variety | Germination Time | Watering Frequency (Post-Germination) |
|---|---|---|
| Radish | 2–3 days | Daily or as needed (bottom watering) |
| Broccoli | 3–4 days | Daily (light bottom watering) |
| Pea Shoots | 2–3 days | Daily (more as they grow) |
| Basil | 5–7 days | Every 2–3 days (keep evenly moist) |
| Sunflower | 2–3 days | Daily, heavy drinker after sprouting |
How to Water Microgreens from the Moment You Plant
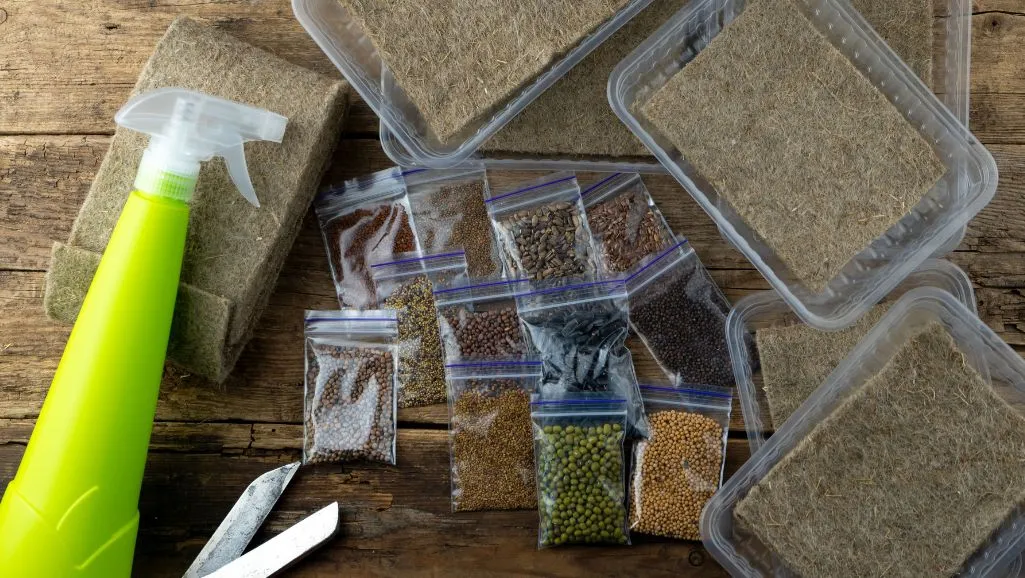
Before you sow your seeds, your growing medium must be evenly moist, not soggy. Think of it like a wrung-out sponge: damp to the touch but not dripping if you’re using soil or coconut coir, mix water into the medium with your hands or a spoon until the moisture feels consistent throughout. For mats or pads, soak them briefly and then let any excess water drain off before placing them in the tray.
Once the medium is ready, sprinkle your seeds across the surface. Some growers like to mist the seeds directly after sowing to help them settle in, especially if they’re small or light, like broccoli or basil. A few light mists with a spray bottle will do the job—don’t soak them. Large seeds like sunflowers or peas often don’t need misting at all if the medium was damp to begin with.
Humidity and Avoiding Waterlogging
Humidity plays a big role during germination. Most growers cover trays with a blackout lid or stack trays to create pressure and retain moisture. The moisture you added during this phase might last 2 to 3 days. Avoid lifting the lid too often; the trapped humidity helps the seeds sprout evenly. However, if you suspect the medium is drying out early, a light misting can help—just be careful not to saturate the tray.
Waterlogging at this stage is a common problem. It slows down germination and encourages mold. If water pools on the surface or the tray feels heavy, hold off and let it breathe before misting again. Once the seeds sprout, you’ll shift your watering style to match their growing needs.
What No One Tells You About Watering After Germination
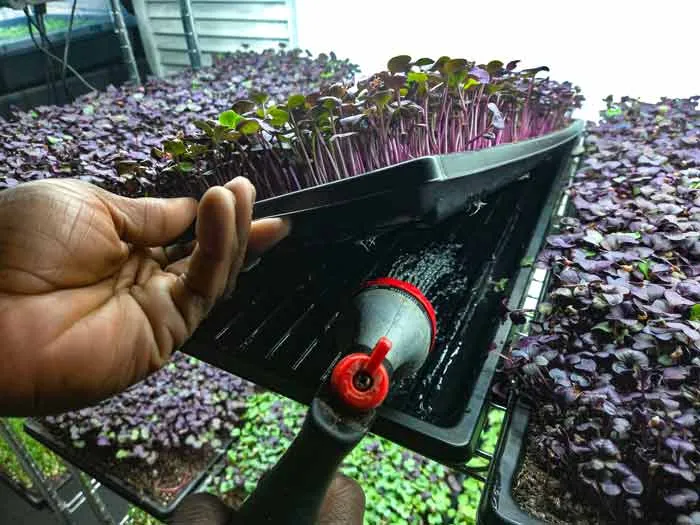
Once your seeds sprout and begin pushing up their first leaves, it’s time to switch to a more structured watering routine. Bottom watering becomes the go-to method at this point. It’s simple: pour water into the solid tray beneath your growing tray, let the roots soak up what they need, then remove any excess after 10–15 minutes. This helps keep the surface dry, which lowers the risk of mold and stem rot.
Top Watering Trays
Top watering, such as misting, still has its place but should be used sparingly now. If you notice dry patches or if seedlings look droopy at the edges, a gentle mist can help—but go easy. Use a fine mist spray bottle or a hand-pump mister that doesn’t blast the greens. Aim above the plants and let the mist fall like a light rain. Avoid soaking the leaves or letting water sit on them for too long.
Bottom Watering Trays
Here’s a simple step-by-step for bottom watering your trays:
- Check the weight of your tray—if it feels light, it’s time to water.
- Pour about 1/4 to 1/2 inch of water into the bottom tray.
- Let it sit for 10 to 15 minutes.
- Tilt the tray to drain any leftover water.
If you’re growing in a mat or hydroponic pad, keep an eye on the edges—they dry out first. You might need to rotate the tray or gently top up areas that aren’t wicking water well.
As your microgreens grow taller and denser, they’ll drink more, especially in warm or bright conditions. Stick with bottom watering, adjust for how quickly the medium dries, and keep airflow steady to avoid dampness building up on the leaves.
How Often Should You Water Microgreens?
There’s no one-size-fits-all watering schedule, but a consistent method based on observation works best. One of the easiest tricks is the tray-weight method. When a tray is freshly watered, it feels noticeably heavier. As it dries out, it becomes lighter. Pick up your tray daily to get a feel for how fast it’s drying, then adjust your watering schedule accordingly.
During the blackout phase, you might only need to water once after sowing. Evaporation is low because the lid traps moisture, and the seeds haven’t sprouted yet. Once the tray enters the light and growth phase, that changes quickly. Most varieties need daily watering at this point, especially if grown under lights or in a dry indoor climate. But if your growing medium holds water well, like soil or coir, you might get away with watering every other day.
Most growers check trays daily for bottom watering but only add water when needed. Over-watering encourages mold, especially in dense crops like sunflower or radish. Pea shoots, on the other hand, tend to be more forgiving and usually need more frequent watering because of their size and thirst.
Here’s a basic guide to help you plan:
| Microgreen Variety | Germination Phase | Growth Phase Watering | Notes |
|---|---|---|---|
| Radish | Water once at sowing | Bottom water daily | Fast grower, drinks a lot after sprouting |
| Broccoli | Water once or mist lightly | Bottom water daily | Keep surface dry to prevent mold |
| Pea Shoots | Water every 1–2 days | Bottom water every 1–2 days | Needs more as stems stretch |
| Basil | Mist as needed | Bottom water every 2–3 days | Sensitive to soggy medium |
| Sunflower | Water daily after sowing | Bottom water daily | High mold risk if top watered |
Checking your trays each morning, adjusting based on weight and appearance, gives the best results. Dry edges, droopy tops, or pale leaves are signs to water. Mushy stems, mold, or that musty smell mean you’re overdoing it.
Water Quality: What’s Safe to Use?
Not all water is equal when it comes to growing microgreens. While tap water is the most convenient, it often contains chlorine or chloramine, which can harm delicate roots and affect microbial life in the medium. If tap water smells strongly of chemicals, let it sit out overnight before using, or run it through a simple filter. This lets the chlorine evaporate and helps avoid buildup in the trays.
Filtered water or rainwater tends to be gentler and more consistent. Rainwater works well if collected cleanly, without roof debris or standing water. A countertop filter (like a Brita or PUR) is good enough for most home growers.
Ideal pH for Growing Microgreens
The ideal pH for water used on microgreens is slightly acidic, between 6.0 and 6.5. Testing your water with pH strips might be worth it if you see issues like yellowing leaves or poor growth. Most tap water is between 6.5 and 7.5, which usually works fine unless your plants are extra sensitive.
Water Temperature
Water temperature also matters. Cold water from the tap can shock young roots and slow down growth. Aim to use room-temperature water whenever possible. Fill a watering can or container with water and let it sit for a few hours before using it.
Can you water microgreens with tap water? Yes, make sure it’s not too cold or heavily treated. When in doubt, filtered or dechlorinated water gives you a clean start and fewer surprises.
Avoid These Watering Mistakes That Kill Microgreens Fast
Signs of Overwatering
Overwatering is the fastest way to ruin a tray of microgreens. If you see mold on the soil surface, notice a musty smell, or find slimy, brown roots underneath, you’ve likely kept things too wet. This often happens when trays don’t have proper drainage or water is left standing at the bottom for too long. To fix it, let the tray dry out more between waterings, improve airflow with a small fan, and switch to bottom watering if you haven’t already.
Signs of Underwatering
Underwatering causes a different set of problems. Droopy shoots, pale colors, and slow growth mean the roots can’t meet the plant’s needs. Your watering routine isn’t frequent enough if the medium pulls away from the tray edges or feels bone dry. A light bottom soak followed by consistent checks can usually bounce the tray back—don’t flood it all at once.
Airflow
You might also notice mold forming even if you’re not overwatering. This often relates to poor airflow or trays placed too close together. Stagnant air creates perfect conditions for mildew and rot. Use a small oscillating fan to keep the air moving, and space out trays to give them room to breathe.
Light
Light is another indirect player. Weak lighting can cause slow growth and overly damp soil because plants aren’t absorbing water quickly enough. Strong, consistent lighting encourages fast, healthy development and faster water uptake.
Keeping the balance means paying attention to both water and the environment. If one thing is off, it often shows how your plants drink.
One Size Doesn’t Fit All: Adjust Your Watering at Every Growth Stage
Germination phase
Microgreens need different watering strategies at different stages of their short life. During germination, your focus is on high humidity and minimal water movement. The medium should be moist from the start, and most growers skip daily watering for the first two or three days while seeds sprout under blackout lids. If things feel dry, a quick mist might help, but less is more at this stage.
Growth Phase
Once sprouts break the surface and enter the growth phase, they need more frequent watering. Bottom watering becomes essential here to keep roots moist without soaking the leaves. This is when your watering habits have the most impact. Check trays daily—sometimes even twice a day if the room is warm and dry. Look for light tray weight, dry edges, or slightly drooping shoots to know it’s time to water.
Pre-harvest Phase
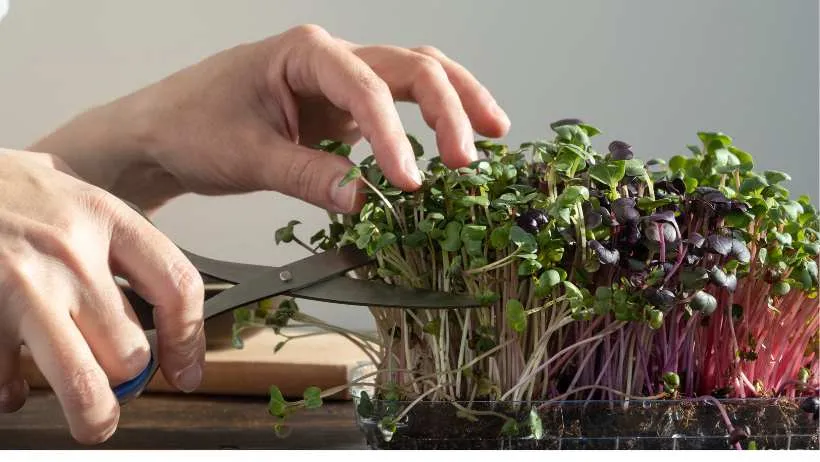
As harvest approaches, you’ll want to ease up. In the pre-harvest phase, reduce watering about 12 to 24 hours before cutting. This gives your greens a crisper texture and reduces moisture that can shorten shelf life. It also makes them easier to cut cleanly without soggy stems or messy trays.
Matching your watering to the plant’s stage, you support strong germination, steady growth, and a clean harvest with fewer problems like mold or overgrowth.
The Tools You Need for Easy, Mess-Free Watering
Misting Bottle
Using the right tool can distinguish between a smooth-growing tray and one full of issues. A fine mist spray bottle works well for small setups or beginner growers during germination. It’s gentle on seeds and lets you moisten the surface without washing anything away. Just make sure the nozzle creates a light mist, not a stream.
Measuring Cup, Garden Hose & Spray Nozzle
Once your microgreens sprout, switch to tools that make bottom watering easier. A simple measuring cup or small watering can with a narrow spout lets you control how much water goes into the bottom tray. For larger grow setups, a pump sprayer or garden hose with a spray nozzle helps speed things up, but use the mist or shower setting to avoid damaging the plants.
If you’re working with multiple trays, bottom-watering trays with no holes are worth having on hand. You can pour water into these, set your growing tray inside, and let the roots wick up what they need. After about 10 to 15 minutes, just pour off any standing water.
Different tray sizes call for different tools. A small 5×5 tray might only need a cup of water every other day, while a full 10×20 tray could need several cups daily, especially with thirsty greens like peas or sunflowers. Having tools sized for your setup makes daily watering quicker and more accurate, helping you avoid both dry spots and overwatering.
Cheat Sheet: Sample Schedules for 5 Popular Microgreens
Here’s a breakdown of how different microgreens respond to watering, based on their growth speed, water needs, and tray size. These examples can help you build a routine that fits the crops you grow most.
Watering Schedule Examples for Popular Microgreens
| 🌱 Microgreen | ⏱️ Germination Time | 💧 Watering Method | 🔁 Frequency | ✂️ Harvest Time |
|---|---|---|---|---|
| Sunflower | 2–3 days | Bottom watering | Daily after sprouting | 7–10 days |
| Radish | 2–3 days | Bottom watering | Daily | 6–8 days |
| Pea Shoots | 2–3 days | Bottom watering | Every 1–2 days | 10–14 days |
| Broccoli | 3–4 days | Bottom watering | Daily | 7–10 days |
| Basil | 5–7 days | Bottom watering | Every 2–3 days | 17–21 days |
Sunflower and radish grow quickly and get thirsty, so they need close attention once the blackout lid comes off. Pea shoots have thicker stems and can go a bit longer between waterings, but they drink a lot once they get going. Broccoli prefers consistent moisture without getting soaked, while basil needs the most patience—it’s slower to germinate and doesn’t like waterlogged conditions.
Use this table as a guide, but don’t forget to check your trays daily. Weight, leaf appearance, and soil moisture are better indicators than a fixed schedule.
Pro Tips That Make Watering Easier, Faster, and Way More Reliable
Lift & Feel Technique
As you fine-tune your watering routine, one of the best habits you can build is using the tray-weight method. Lift the tray daily at the same time—morning works best—and get a feel for how heavy it is when fully watered versus when drying out. This trick gives you real-time feedback, so no guesswork is needed.
Keep a Consistent Routine
Stick to a consistent routine, but don’t let it run on autopilot. Weather, humidity, and light levels shift weekly, especially indoors near windows or vents. Even if you’ve watered the same variety a dozen times, it’s still worth checking for dry corners or wet patches. Consistency is key, but observation keeps your trays healthy.
Sanitize Trays
Keep your tools and trays clean. Bacteria and mold love leftover moisture and debris. Between grows, sanitize trays and watering cans using a mild bleach solution (1 tablespoon per gallon of water) or white vinegar. Rinse well before reusing.
Test and Log Your Watering Results
If you’re serious about improving, start logging your results. Note the watering frequency, how the greens responded, and any problems you encountered. After a few cycles, patterns emerge, making your next grow even better.
Watering might seem simple, but getting it right is the foundation of growing healthy, mold-free microgreens that taste great and last longer after harvest.
FAQs: Real Answers to the Most Common Watering Questions
How often should I water my microgreens?
Most microgreens need water daily after germination, but the exact timing depends on the variety, tray size, and environment. Use the tray-weight method and check the growing medium—if it feels dry or the tray is light, it’s time to water.
Can you water microgreens with tap water?
Yes, as long as your tap water doesn’t have heavy chlorine or chloramine levels. If it smells strongly of chemicals, let it sit out overnight or run it through a basic filter before using.
Do you mist microgreens every day?
Misting is best for the germination phase or small top-ups. Once the plants sprout, switch to bottom watering to avoid wet leaves and reduce the risk of mold. Daily misting can lead to soggy stems and surface mold.
What’s the best medium for water retention and drainage?
Coconut coir is one of the most beginner-friendly options. It holds water evenly without getting soggy and is clean to handle. Soil works well, too, but can be messy. Hemp mats and grow pads dry out faster and need more frequent watering.
How do I know if I’ve overwatered my microgreens?
Look for yellowing stems, soggy spots, mold, or a musty smell. If roots appear slimy or trays feel heavy even after several hours, you may be overwatering. Improve airflow and cut back slightly on watering frequency.
How long should I leave water in the tray when bottom watering?
10 to 15 minutes is usually enough for the medium to wick up what it needs. After that, pour out any leftover water so the roots don’t sit and rot.
Can I water with nutrient solution or compost tea?
You can, but it’s optional. Most microgreens grow fine with plain water, especially in the first 10–14 days. If you use a nutrient mix, apply it lightly and avoid foliar feeding (spraying the leaves) to reduce mold risk.