Ever find yourself staring at a batch of microgreens, wondering how to keep them fresh for longer? Dehydrating microgreens is a fantastic way to extend their shelf life, even without a fancy dehydrator. Not only does it save space, but it also locks in their nutrients for future use. Let’s explore how you can dehydrate microgreens right at home without any special equipment.
Why Dehydrate Microgreens?
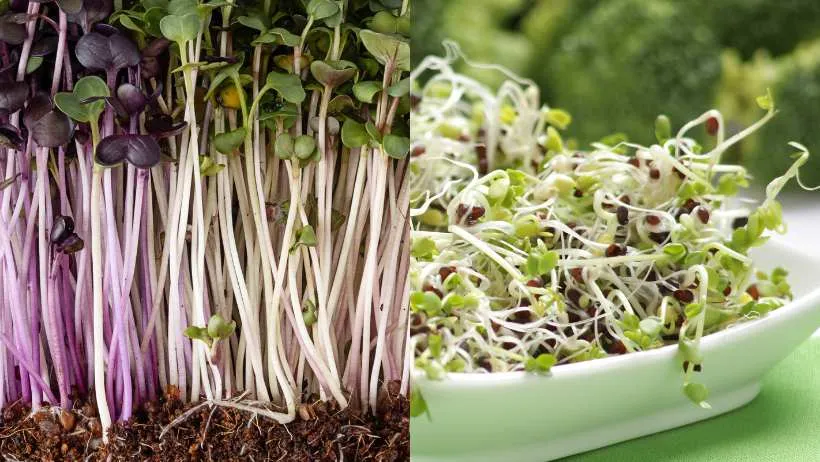
Microgreens may be small, but they’re packed with nutrition. These tiny greens are loaded with vitamins, minerals, and antioxidants that support your health in various ways. However, they don’t stay fresh for long, which can be frustrating. That’s where dehydration comes in.
By dehydrating microgreens, you’re not just extending their usability—you’re also keeping their nutrients intact. Dehydrated microgreens can be turned into a homemade green powder, which you can sprinkle over your meals to add an extra boost of nutrition. This process also prevents waste, so you can enjoy your greens for longer.
Whether you’re making your own green powder or just trying to keep your microgreens from spoiling, dehydration is a smart and effective solution.
Overview of Dehydration Methods Without a Dehydrator
Now that we’ve discussed why dehydrating microgreens is useful, let’s explore how to do it without a dehydrator. It’s simpler than you might think, and you don’t need any special gadgets to get it done.
Oven Drying Method: This is the most straightforward approach. Your oven’s low heat setting can mimic the slow, steady drying process of a dehydrator. The downside? You’ll need to keep an eye on the greens to prevent them from getting too crispy. But if you’re willing to watch them closely, the oven method is a reliable way to dehydrate microgreens.
Air Drying Method: Prefer a more hands-off method? Air drying is a no-fuss, energy-free option that works well if you have time. All you need is a well-ventilated space and a drying rack. The only drawback is that it takes longer—sometimes days—but the flavor of your greens will be worth the wait.
Sun Drying Method: If you live in a sunny, dry climate, this method is as natural as it gets. Just lay your greens out in a sunny spot and let the sun do the work. It’s a simple and effective method, but you’ll need to watch the weather to ensure your greens stay dry.
Each method has its own advantages, so choose the one that works best for you. Whether you use your oven, let the air do the work, or rely on the sun, there’s a way to dehydrate microgreens that fits your needs.
Related Post: 7 Benefits of Dehydrating Microgreens that May Surprise You
Step-by-Step Guide to Dehydrating Microgreens in the Oven
Ready to preserve your microgreens? The oven is a great tool for this. Follow these steps to ensure your microgreens dry evenly and retain their nutrients.
Step 1: Preparation of Microgreens
Start by washing your microgreens gently. You want them clean but not soaking wet. After washing, spread them out on a clean towel or paper towels to dry them off. Removing excess moisture before they go in the oven is important to avoid steaming them instead of drying.
Step 2: Setting Up the Oven for Low Heat Drying
Preheat your oven to its lowest setting, ideally between 120°F and 140°F (50°C to 60°C). If your oven doesn’t go that low, you can prop the door open slightly to let some heat escape. Line your baking trays with parchment paper and spread the microgreens out in a single layer, giving them space to dry evenly.
Step 3: Duration and Temperature Settings
Place the trays in the oven and check on them every 30 minutes. Depending on the moisture content and type of microgreens, it could take anywhere from 2 to 4 hours. You’ll know they’re ready when the greens are crisp and brittle to the touch. If they’re still soft, give them more time. Patience is key here—don’t rush the process.
Once dried, let them cool completely before storing. Your oven-dried microgreens are now ready to be used whenever you need them!
Step-by-Step Guide to Air Drying Microgreens
If you prefer a method that doesn’t require constant attention, air drying is a great option. It’s simple, cost-effective, and doesn’t require any special equipment—just time and a good spot.
Step 1: Preparing Microgreens for Air Drying
As with oven drying, start by washing your microgreens and patting them dry. The drier they are at the start, the faster the air drying process will be. Once dry, spread them out in a single layer on a drying rack or mesh screen.
Step 2: Creating a Homemade Drying Rack
If you don’t have a drying rack, you can easily make one using materials like a mesh screen or an old window screen. Lay the microgreens out in a single layer, making sure they’re not piled on top of each other. If you’re working with bundles, tie them with string and hang them upside down in a well-ventilated area.
Step 3: Best Practices for Air Drying Indoors
Find a spot that’s warm, dry, and out of direct sunlight. Too much sun can cause the microgreens to lose their color and nutrients, so a shaded, well-ventilated area is ideal. Depending on the humidity and air circulation, the drying process can take a few days to a week. Check the microgreens daily, turning them over occasionally to ensure even drying. They’re ready when they’re crisp and break easily between your fingers.
Air drying takes a bit longer, but it’s a low-maintenance way to preserve your microgreens without using any electricity. Plus, there’s something satisfying about letting nature do the work.
Step-by-Step Guide to Sun Drying Microgreens
For those who enjoy using natural methods, sun drying microgreens is a straightforward and effective approach. This method is ideal if you live in a warm, dry area and want to preserve your greens using the sun’s energy.
Step 1: Ideal Conditions for Sun Drying
Sun drying requires warm, sunny days with low humidity. The less moisture in the air, the faster your microgreens will dry. Find a spot that gets plenty of sunlight but is sheltered from wind and pests. A screened porch or balcony works well.
Step 2: Preparing and Setting Up Microgreens for Sun Drying
As with other methods, start by washing and thoroughly drying your microgreens. Spread them out in a single layer on a clean surface, such as a mesh screen, baking sheet, or even a piece of cloth. Make sure air can circulate around the greens to prevent moisture buildup.
For best results, cover the microgreens with a glass or clear plastic cover to concentrate the sun’s heat while keeping insects away.
Step 3: Monitoring the Drying Process
Sun drying can take anywhere from a full day to several days, depending on the temperature, humidity, and thickness of your microgreens. Check them regularly to ensure they’re drying evenly. If the weather changes—say, it gets cloudy or rain is on the way—bring the microgreens inside to prevent them from absorbing moisture. You’ll know they’re ready when they’re crisp and dry to the touch.
Sun drying is a natural way to preserve microgreens, giving them a sun-kissed flavor. Just keep an eye on the weather and be patient.
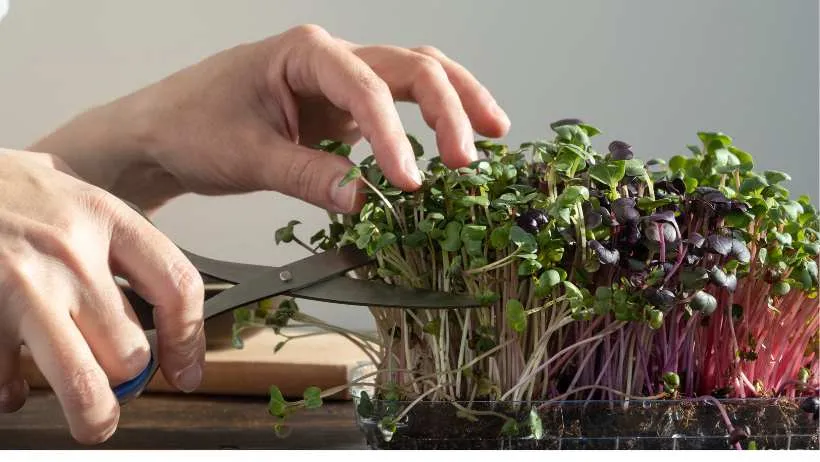
Storing Dehydrated Microgreens
You’ve successfully dehydrated your microgreens, and now it’s time to think about storage. Proper storage is essential to keep them fresh and ready to use.
Step 1: How to Store Dehydrated Microgreens to Maximize Shelf Life
Once your microgreens are fully dried and cooled, transfer them to an airtight container. Glass jars with tight-fitting lids work best, but if you’re using plastic containers or zip-top bags, make sure to squeeze out as much air as possible before sealing. The less air inside, the longer your microgreens will stay fresh. Store these containers in a cool, dark place like a pantry or cupboard. Properly stored, dehydrated microgreens can last up to a year—plenty of time to enjoy them in your favorite dishes.
Step 2: Creating Homemade Green Powder from Dehydrated Microgreens
If you’re feeling creative, consider turning your dehydrated microgreens into a homemade green powder. It’s easy: just grind the dried greens in a coffee grinder or a high-speed blender until they’re a fine powder. This green powder is incredibly versatile—you can add it to smoothies, soups, sauces, or sprinkle it over your favorite dishes for an extra nutritional boost. Plus, it takes up even less space in your pantry!
Step 3: Uses of Dehydrated Microgreens in Everyday Recipes
Dehydrated microgreens can be rehydrated by soaking them in water for a few minutes, making them a great addition to salads, sandwiches, and wraps. Alternatively, you can crumble them over roasted vegetables, stir them into pasta sauces, or blend them into dressings. The possibilities are endless, and with your homemade green powder, you’ve got a concentrated source of nutrients at your fingertips.
With your microgreens safely stored, you’re now ready to enjoy their benefits anytime you like. Whether you use them whole, crushed, or as a powder, dehydrated microgreens are a convenient way to keep your diet packed with nutrients year-round.
Tips and Tricks for Effective Dehydration Without a Dehydrator
Now that you’ve mastered the basics of dehydrating microgreens, let’s cover some tips to ensure you get the best results. These pointers will help you avoid common mistakes and make sure your dehydrated microgreens are as nutrient-rich and tasty as possible.
Tip 1: Common Mistakes to Avoid
One common mistake is not removing enough moisture before starting the drying process. This can lead to uneven drying or even mold. Make sure your microgreens are thoroughly patted dry after washing. Another mistake is rushing the drying process by using too much heat (in the oven method) or overcrowding your drying surface. Dehydration takes time—don’t rush it.
Tip 2: Best Practices for Nutrient Retention
To keep your dehydrated microgreens as nutrient-dense as possible, use low heat and avoid direct sunlight (unless you’re sun drying). High temperatures can destroy some of the vitamins and antioxidants in microgreens, so always opt for the lowest temperature setting in your oven and keep sun-dried greens out of intense, direct sunlight for too long. Also, store your dehydrated microgreens in dark, airtight containers to prevent nutrient loss from exposure to light and air.
Tip 3: Alternative Uses for Dehydrated Microgreens
Dehydrated microgreens are great for adding to dishes and making green powder, but there’s more you can do! Use them as a crunchy topping for salads and soups, mix them into homemade spice blends, or add them to crackers, bread, or even cocktails. Their versatility means you can get creative in the kitchen, adding a boost of flavor and nutrition to just about anything.
By following these tips, you’ll ensure that your microgreens are preserved effectively and remain full of nutrients and flavor. Whether you’re new to preserving food or an experienced hand, these tricks will help you get the most out of your dehydrated microgreens.
Conclusion
Dehydrating microgreens without a dehydrator is not only possible but also rewarding. Whether you use your oven, air dry, or rely on the sun, you’re on your way to preserving these nutrient-rich greens for long-term use.
With a bit of patience and care, you can enjoy the benefits of dehydrated microgreens in your meals all year round. So why not give it a try? Experiment with different methods, perfect your technique, and explore the many ways to preserve your greens at home. Your future self (and your taste buds) will thank you!